If you’re using SharePoint lists for any kind of ticket or request management, you are likely to want to track how long it took to complete the request. We can do this automatically using Power Automate to set a “close date” date-type field.
First, make sure you have a “close date” or “completion date” field in your list!
If you don’t already have one, add a date type column to your list – you can call it “close date”, or “completion date” or whatever you prefer. Make it optional, NOT required. If you want to, you can hide the field from the form (this tutorial is for the title field, but you can do the same for any field).
While you’re in list settings, make sure versioning is enabled in your list – it is required for a later step.
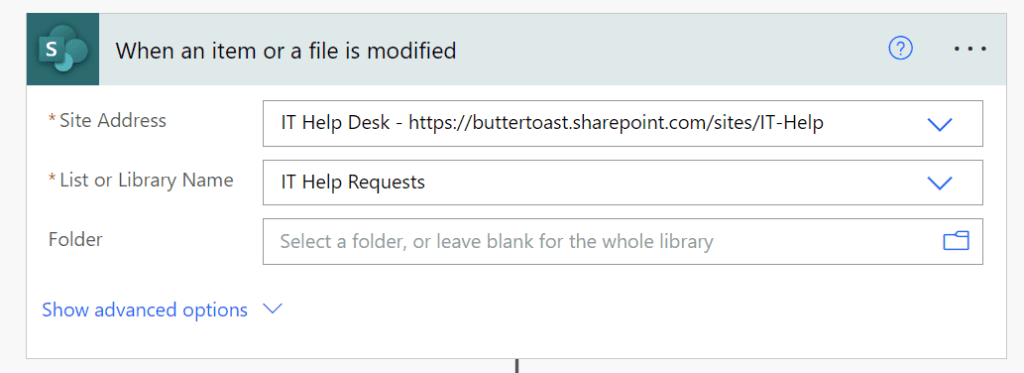
Next, create a Power Automate flow that triggers on item modification
Navigate to make.powerautomate.com and create a new automated cloud flow. Set the trigger condition to “when an item or file is modified” and select your site and list:
If you want to (this is optional – it reduces Power Automate’s resource usage), you can opt to set a trigger condition in the advanced settings such that the flow only triggers when the status is complete – this is assuming you don’t have anything else you want to add to this flow that triggers on other status values. You do this in the ellipsis menu of the first flow step by selecting “settings” there, and adding the condition at the very bottom of the settings:
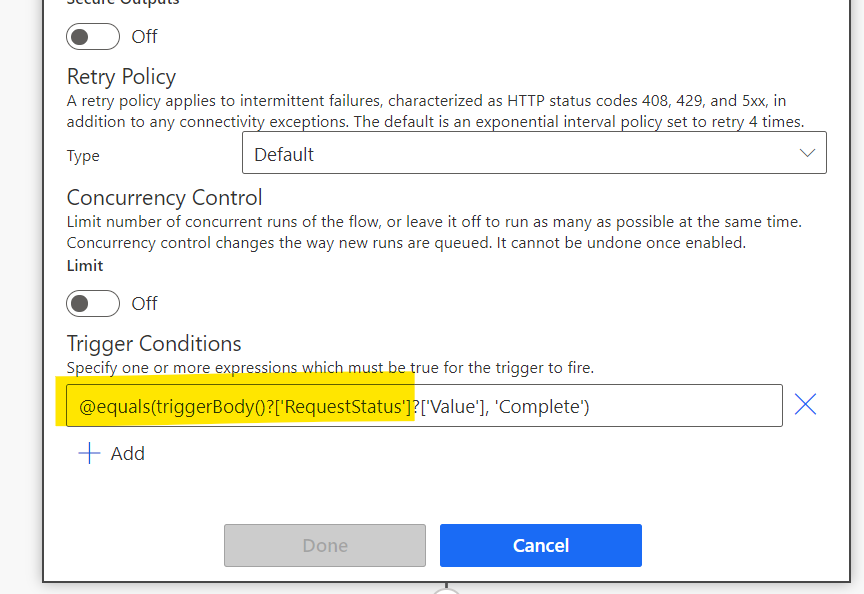
If you aren’t sure how to write a trigger condition, Carl Halligan made an awesome free tool here that generates the trigger condition for you. Just another note – the trigger conditions are very sensitive about using the correct field name – this is usually not exactly the same as the field display name, you can get the correct field name by navigating to your list settings and clicking on the column name. It’s in the address bar. So my request status should be this:

Next add the action “Get changes for an item or file (properties only)”, select your site and list again, enter the ID in the ID field, and set the “Since” to “Trigger Window Start Token” and “Until” to “Trigger Window End Token” – this is the step that lets Power Automate what the prior values were for the fields on the current item. It uses the version history for this, that’s why we needed to make sure that was enabled earlier.
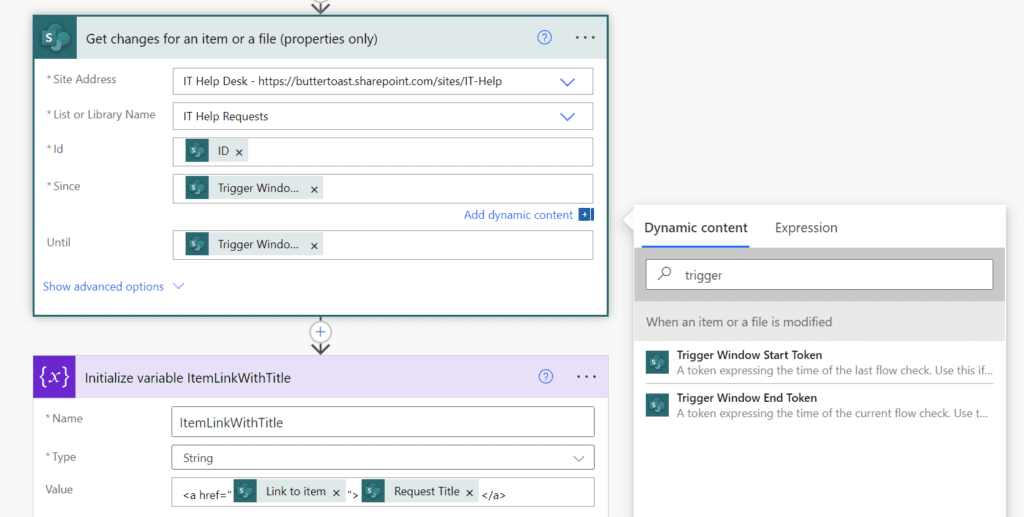
I’ve also added a variable to create a hyperlink to the request title in the screenshot above, because I’m using this same flow to send a completion email when the status changes to complete. The value there is just creating hyperlink text.
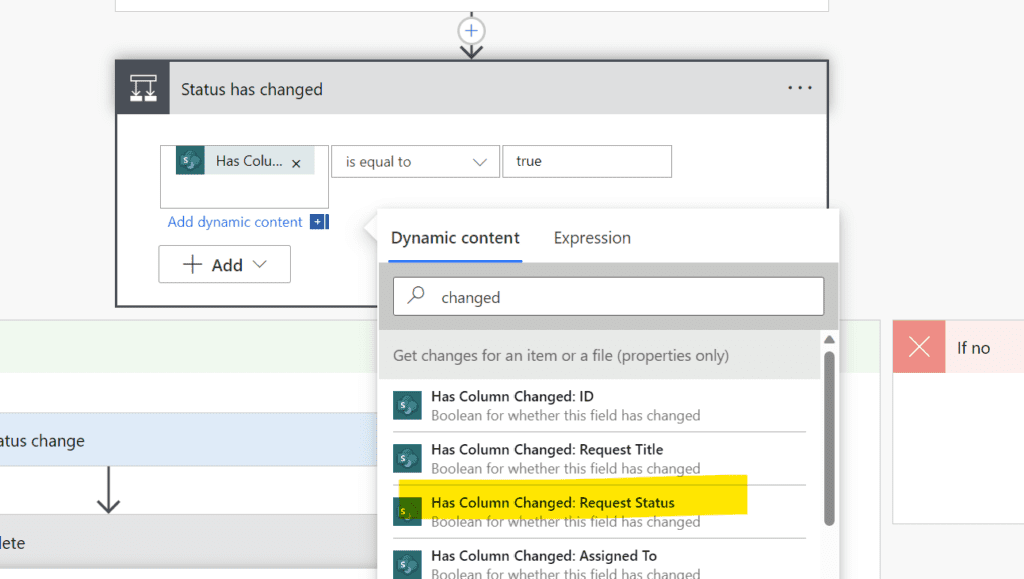
Next, add a condition action to check to see if the request status field has changed (“Has Column Changed: Request Status” is equal to “true”. Since our trigger is all modifications, and the trigger condition is status complete, what this is doing is making sure that the actions are are adding will not trigger for other fields being modified after the item has been marked complete. As an aside, for some reason I can’t get the dynamic content values to show up for “changes,” specifically, when I search on the field name – I searched on “status” and it didn’t come up, so you may have to track it down with another term or by scrolling:
Under the “Yes” branch of the condition, add a step to update the SharePoint list item (and optionally email the requester if you want to do that as well). If you did not use a trigger condition in the first step, add an additional condition check here to check to see if the status value is “Complete” (I used one above, so I did not do this).
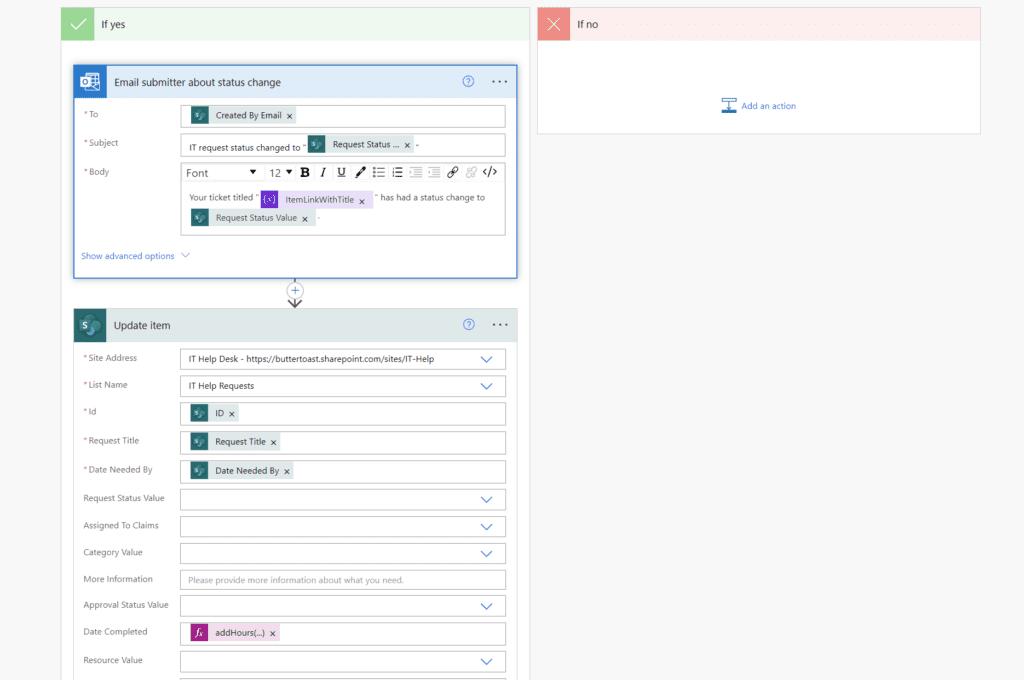
Set your required fields to their same values (as one does with Power Automate…) and make sure to clear out the default value for any choice fields (e.g. if your status field has a default value, it tends to want to set it back to that – if you erase the content of the field in the card, it’ll leave it alone).
The important part – fill in the “Date Completed” field with an expression
We need to set the completed date in the “update item” step. There are probably varying techniques out there for this (if you have another, let me know!), but my go-to is setting it to today’s date and doing an addHours() to adjust to the desired timezone.
Use the “Expression” tab that pops up when you select the field to add your expression. Here’s what I use (I’m on Pacific time, so I use -7 for AddHours to adjust UTC time to Pacific – if you don’t do this, sometimes your close dates will be off by a day):
addHours(utcNow(),-7)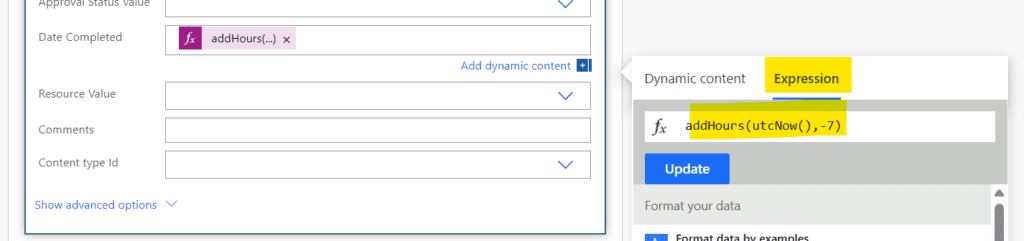
Now, when our items status changes to complete, the flow will email our submitter and set the close date field.
I would recommend testing it now to make sure it’s working. If you find that it’s not triggering, check your trigger condition if you have one and make double-sure that your column name matches the back-end name for the status field.
Now we need to calculate the duration
Options, options… first, in SharePoint
There’s many ways to do this – if you want to stay in the SharePoint / Lists ecosystem, you can add a calculated column to get the “Days to Complete”. To do this, navigate to your list settings and add a new calculated column there. The calculated column interface hasn’t been updated to modern as of 2023, so you end up in the classic UI one way or another.
What we’re doing here is checking to see if the close date field is blank first, because SharePoint tries to do crazy things with the calculation otherwise (we want it to return blank if it’s not closed yet). Then we’re just subtracting the submitted date (which may be called “Created” in your list) from the completed date, this will give us a number of days duration.
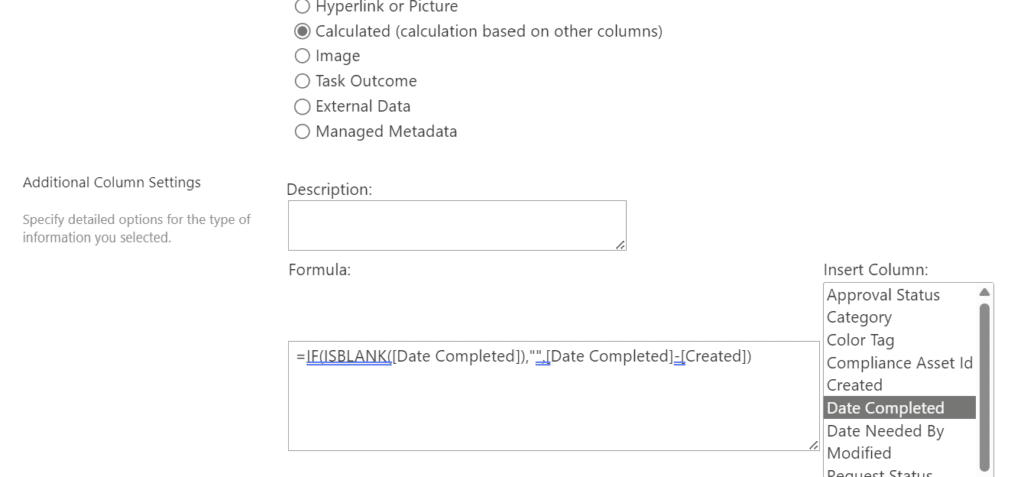
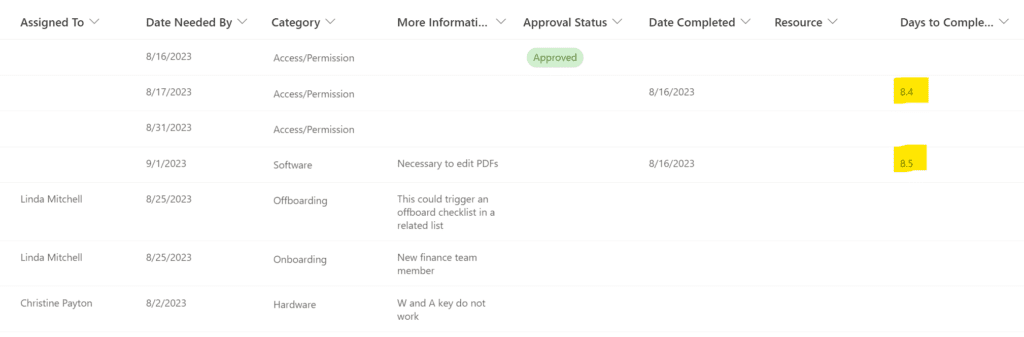
=IF(ISBLANK([Date Completed]),"",[Date Completed]-[Created])Make it a number type field and select how many decimals you want on the same page. Click OK when you’re done and that’s it!
Alternately, calculate this in Power BI and make a full-on report!
You can use the exact same technique in Power BI, subtracting the two date fields, to get a “Days to Complete” there. You could average that by month in a line chart or by assignee for extra fun.
If you have a “date needed by” field in your report, you can actually use the same technique on that to flag requests that were not completed on-time, and then use that to calculate the percentage that were late (say, by assignee or overall).
Connect to your Share Point list first (YouTube link) then add a new custom column. This example is for a different list, so the field names are a bit different than previous examples, but you get the idea:

This content is part of the series on how to create a request management system in SharePoint.