Reminders are an important part of any approval process. Microsoft published an article in their Power Automate blog about using parallel branches for reminders. The technique shared there is my preferred method as well – but if you read through the comments (note: you need to be logged in to see comments on the site), you’ll see that there are complaints that their flow is sending a reminder after the approval is complete.
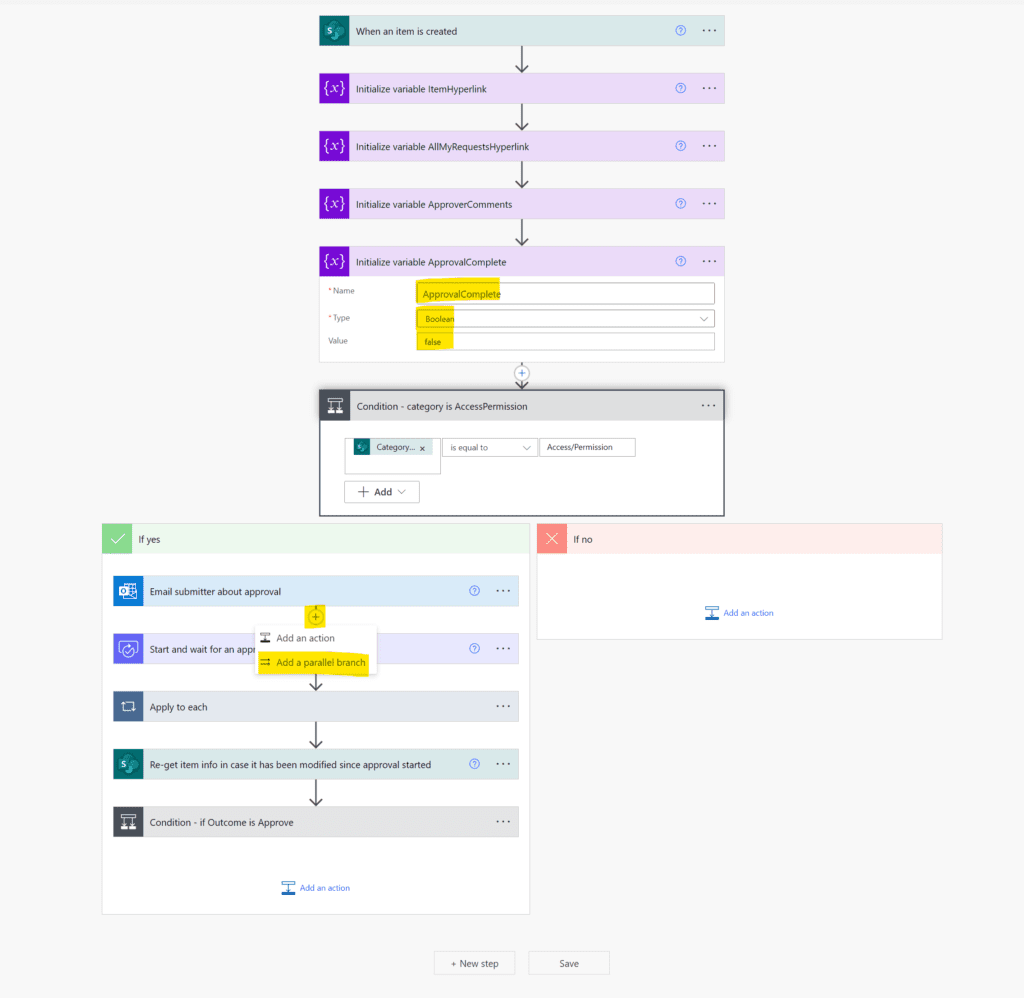
We can fix this by doing a secondary check of the variable value before sending the email as below. These steps should be added as a parallel branch that branches right above your approval step. If you’re unfamiliar with parallel branches, they’re just what they sound like: you’re splitting your flow and running down both branches simultaneously. This lets you do multiple things at the same time in a flow.
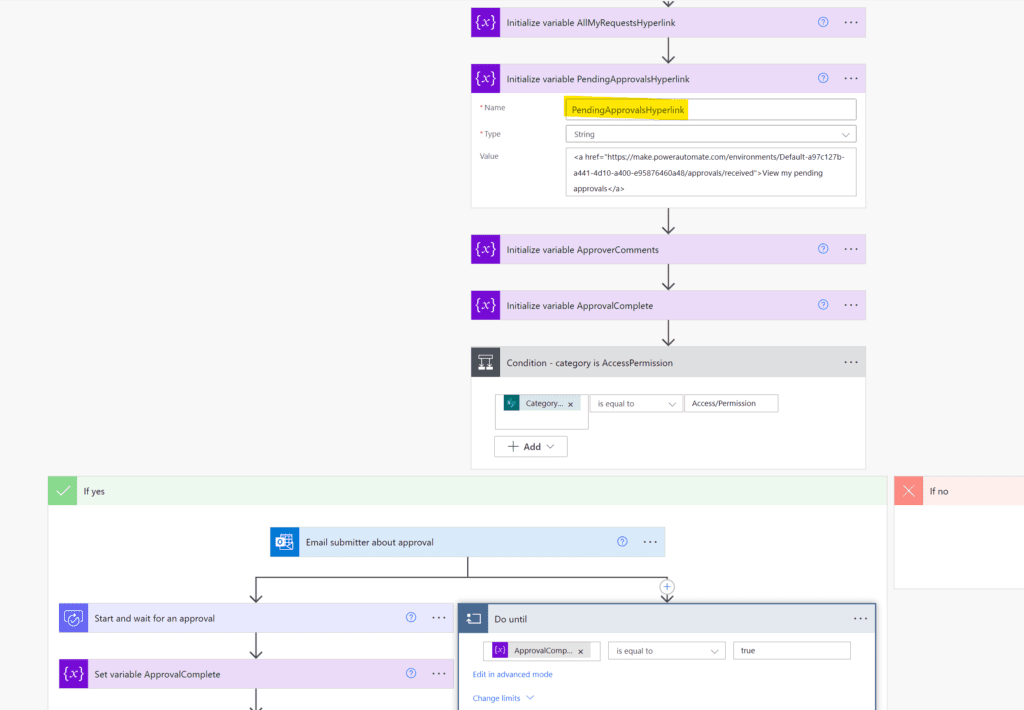
We’re also going to initialize a variable to store a true/false value of whether or not the approval has been completed at the beginning of the flow, setting the default value to “false”. This is being added to the approval process we are creating in the “how to make a good approval flow” article if you want to follow along.
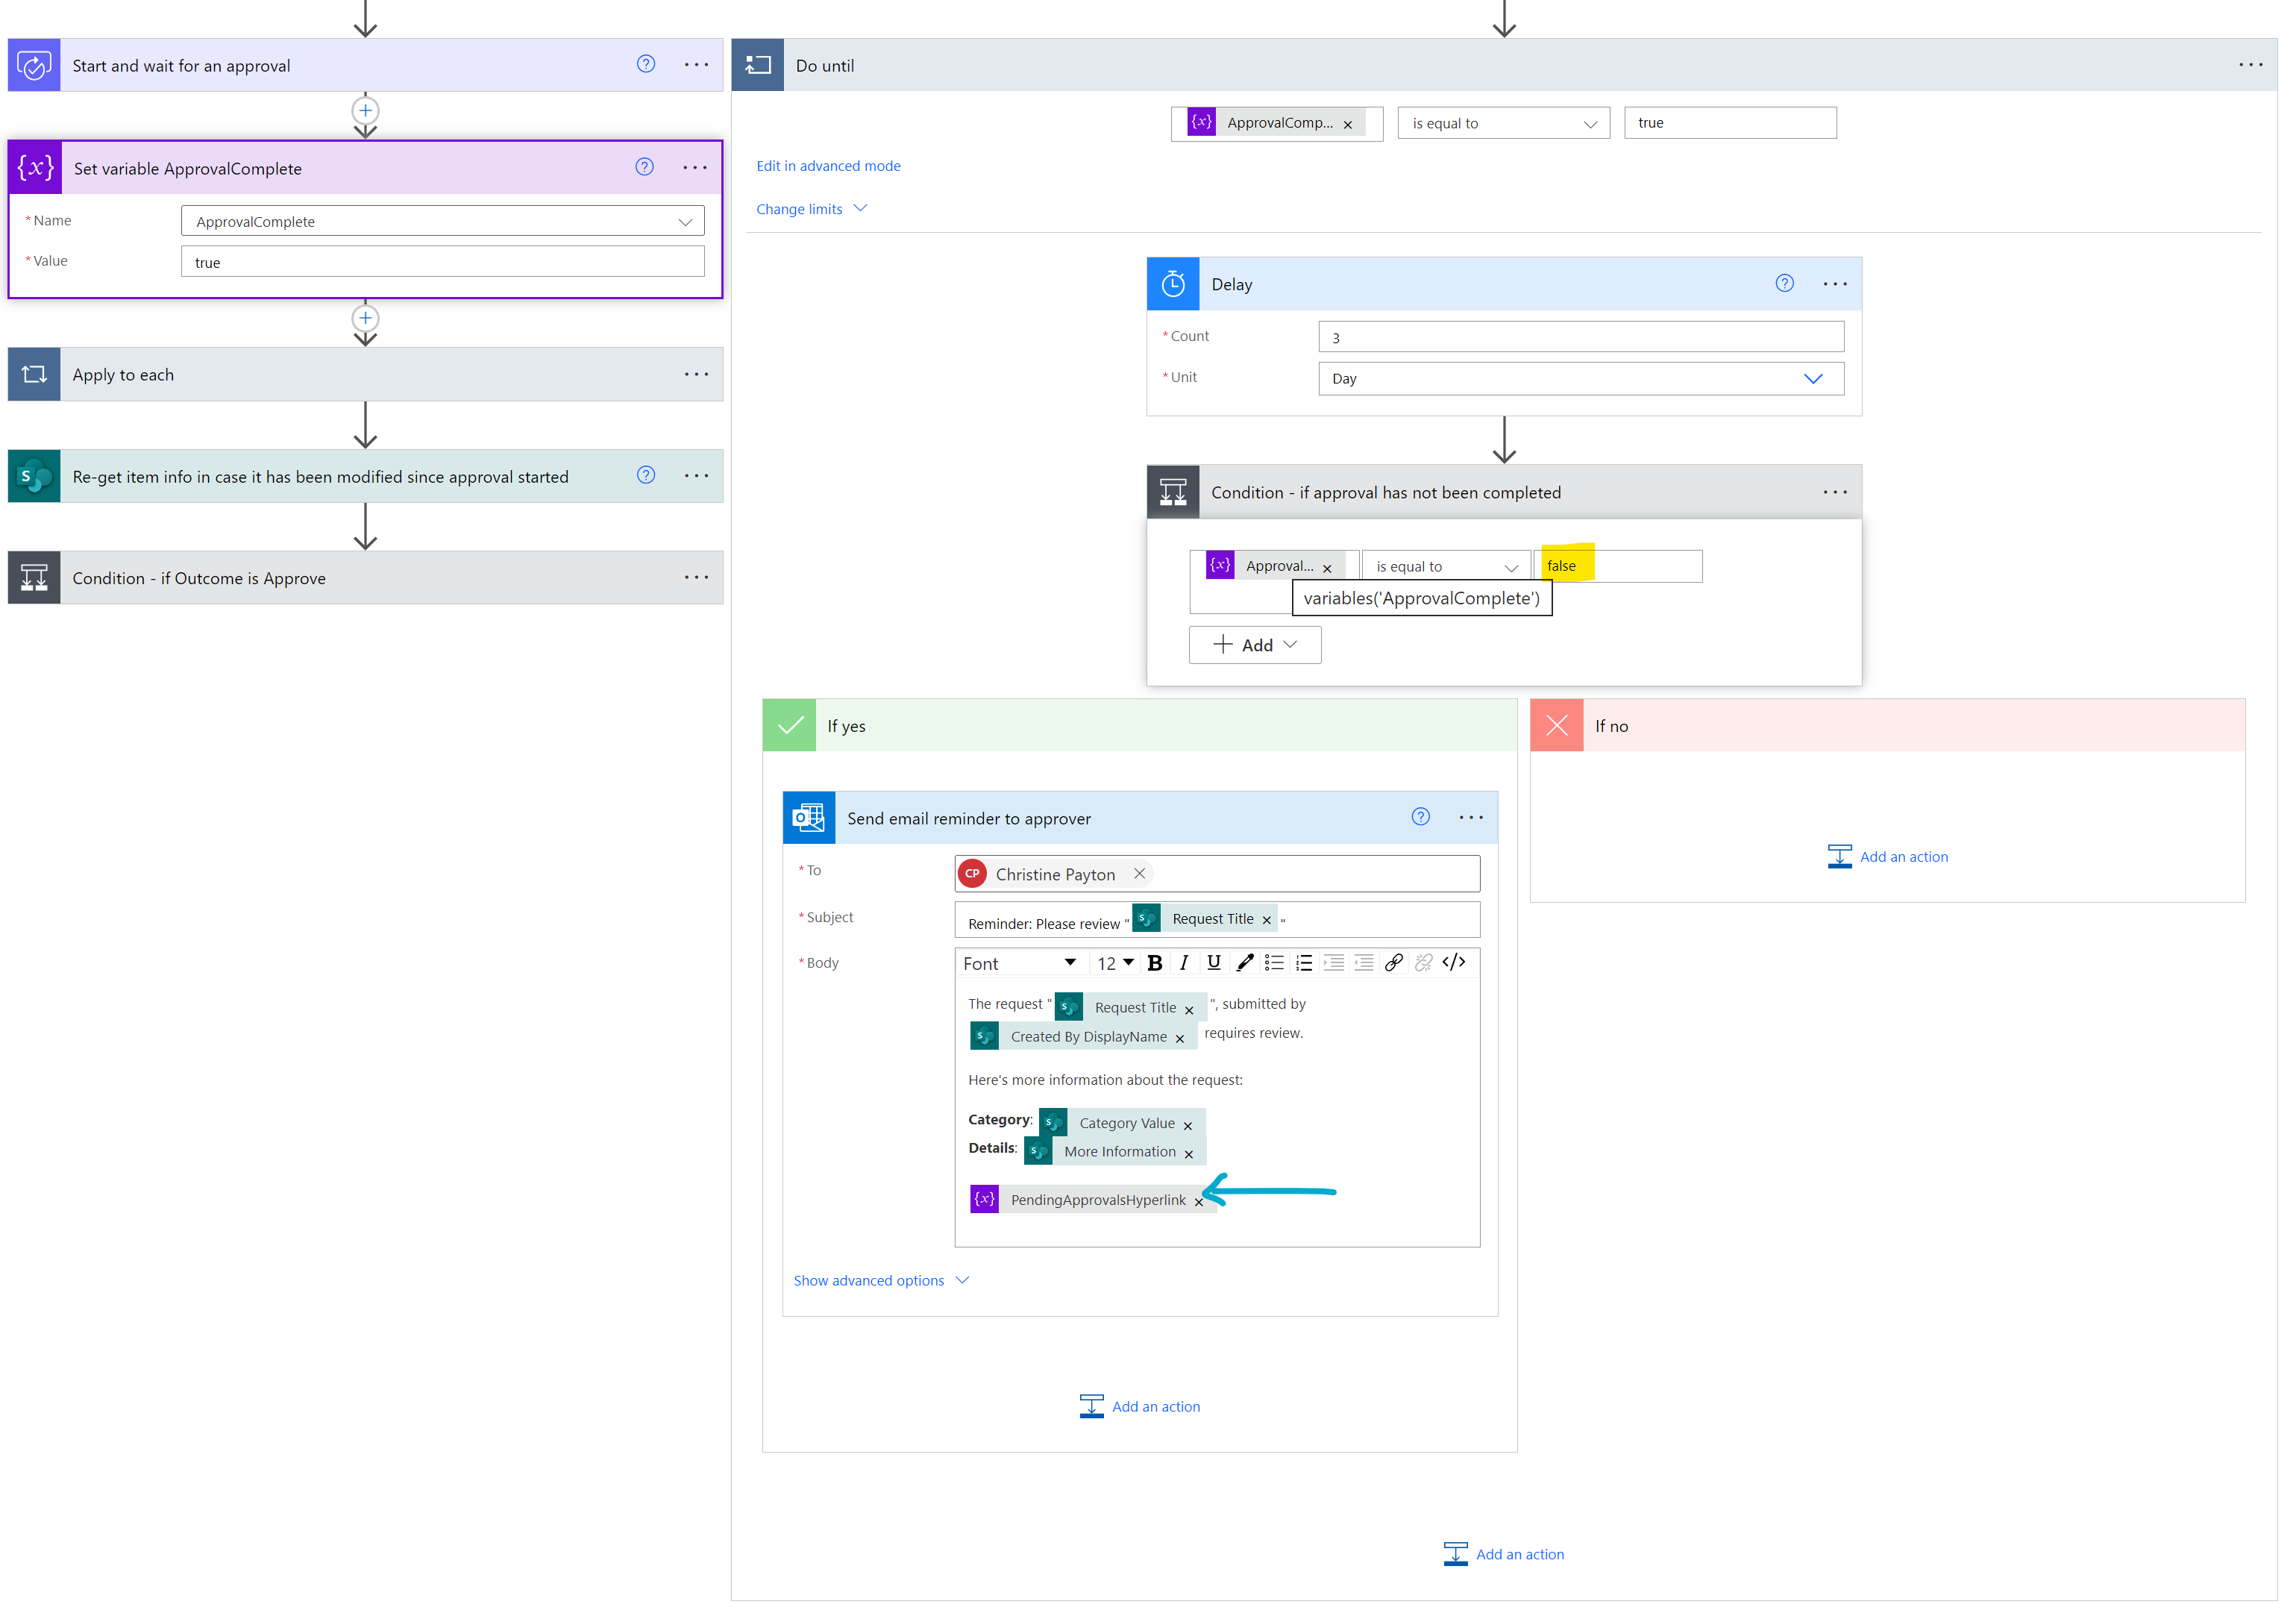
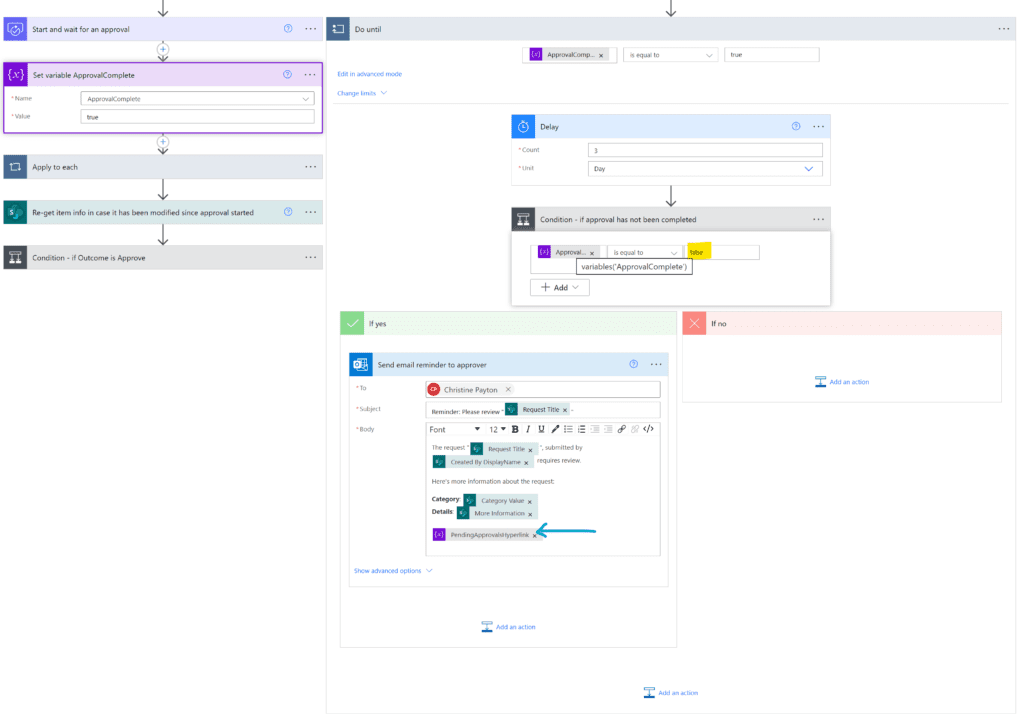
In your parallel branch, add a “do until” action. Pay attention to the “limits” section of the settings – for some reason the default timeout is set to one hour, in the example below I changed it to 14 days (P14D) and set a limit of “4”. I’m using “4” here just because sending more than that number of reminders seems excessive, but you can choose whatever you like here. Have the “do until” loop check the variable we created above – this variable starts out with a value of “false” (not complete), so we need to add a “set variable” step after our approval that sets the value to “true”.

At this point, we are referencing our approver’s emails in more than one location, so you might consider putting their email addresses in a semicolon-separated text string variable, so that you can maintain it in one location.
Get the link to a user’s pending approvals
We should link our approver directly to their pending approvals, because a fair number of people won’t know where to find them without a direct link. You can simply navigate to your own pending approvals in the left sidebar and copy the URL (don’t use my link below, yours will be slightly different):
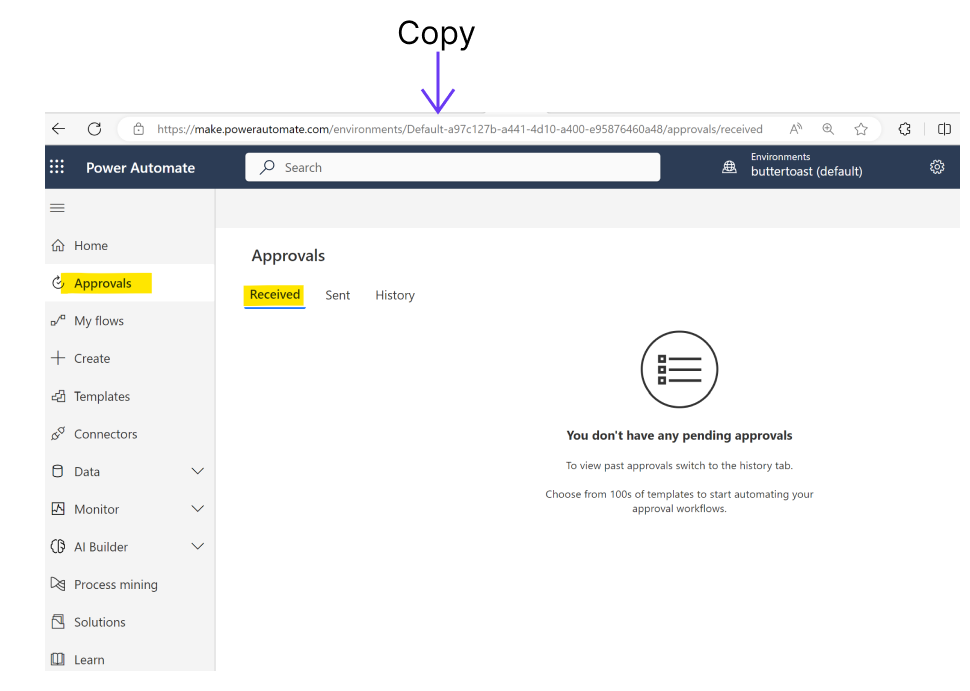
The pending approval URL does have the environment ID in it, so keep that in mind if you’re working in multiple environments (e.g. testing in dev, and moving to prod).
Put that pending approval URL into a variable with some anchor tag HTML to make a hyperlink. You could use compose here since we’re only referencing it once, but since I have so many other text links and bits in variables, I’m using another variable just to keep it internally consistent.
Let’s make another variable to create a hyperlink for the email:
Finish up the “Do until” loop
We are going to add a delay action in our flow of 3 days. Since it’s in our do-until loop, when the approval fires it will wait 3 days before sending the first reminder and then continue to loop and send another email every 3 days until it hits the loop limit of 4, or the approval is complete. I’m using 3 days here so that if the approval starts on a Friday, it won’t send a reminder until Monday.
We’re adding a condition to double check the ApprovalComplete is still false after the delay before sending the email. This will prevent us from inadvertently emailing after the approval has been completed for any reason.
Include your “View my pending approvals” hyperlink variable from above in your “Send an email V2” action. You can use your shared mailbox to send the mail if you’ve configured permission to “send as”.
Note that our approval flow is a “first to respond” approval, meaning that it’s not possible for the approval to still be pending with some assignees having approved and some not. We can simply email all of them because if it’s still outstanding, we know no one has responded. If you are using the “wait for all responses,” you will need to adjust this a bit to record and check the approval state for each assignee before emailing in a for-each loop of assignees.
Error handling – add a notification on approval timeout
In the case where the approval was not responded to before timeout, we want to be notified so that we can address whatever the issue is. The default flow timeout is 90 days… I’d argue we should set the timeout for the approval step to whatever we think is reasonable for our approval process, then add a step that sends an email or other notification on timeout.
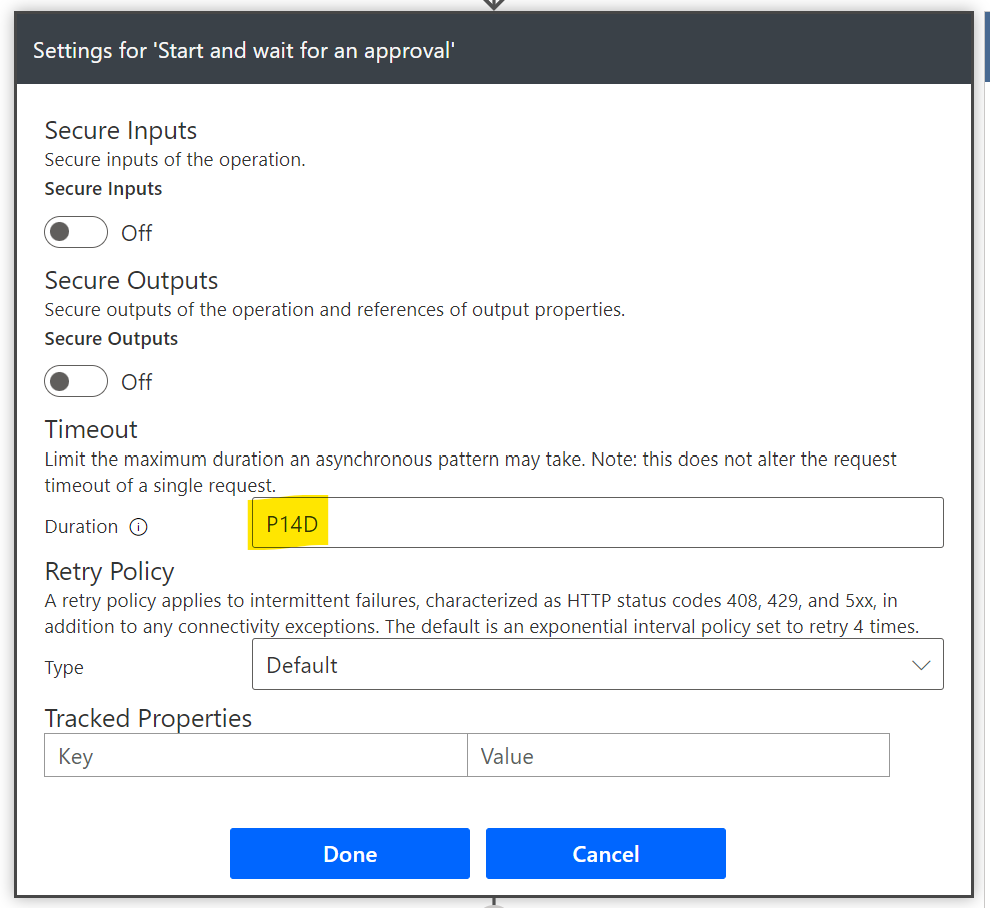
I’m going to go with 14 days here, since I feel like that is long enough to account for most people’s vacations or other delay reasons – that way, if no one responds, it won’t sit there for the full 90 days with no activity. This is configured in the “settings” menu for the approval:

The syntax for this is P, then the number of days, and D, so 14 days would be “P14D”:
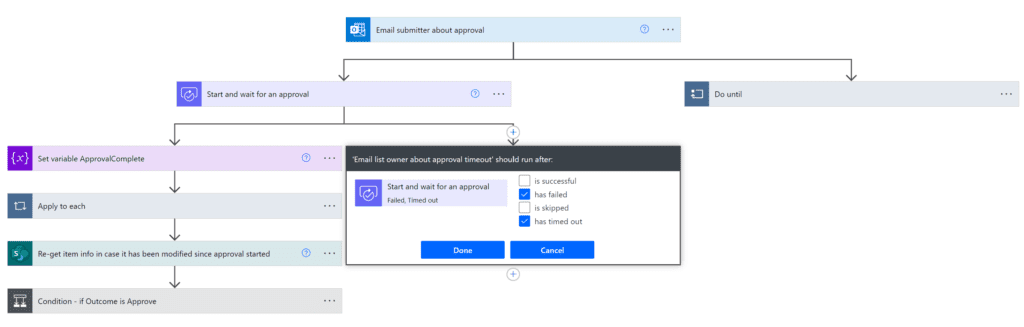
Add a parallel branch directly below the approval step we just modified, then add a “Send an email V2” (or your preferred notification action) step on the new branch. Add the email address, a distribution group, or shared mailbox for whoever “owns” the flow and/or the SharePoint list you’re interacting with, along with some email text to let them know the flow timed out. You could potentially do some hoop-jumping to get the URL for flow history to link in the email – but that is a topic for a future blog post I think. 🙂
Set the run-after using the ellipsis menu for the email action to run after the prior step times out (you could include failures too if you wanted to).
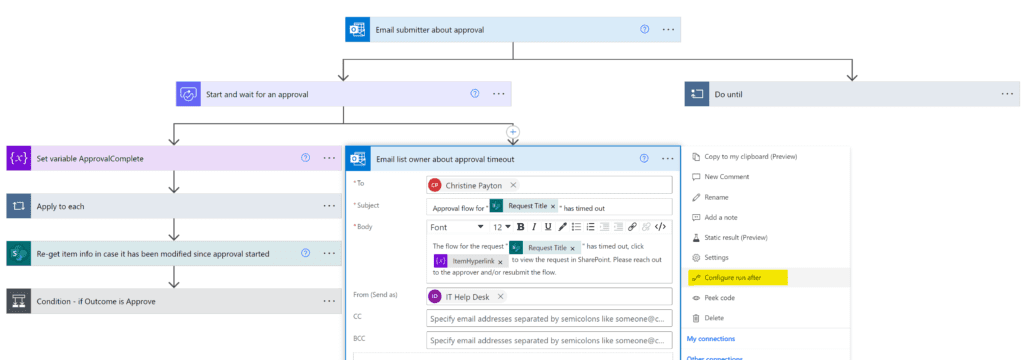
We needed to use a parallel branch here, because the rest of our steps run after approval success – this one needs to run after approval timeout/failure. Make sure to click “done” to save your changes: