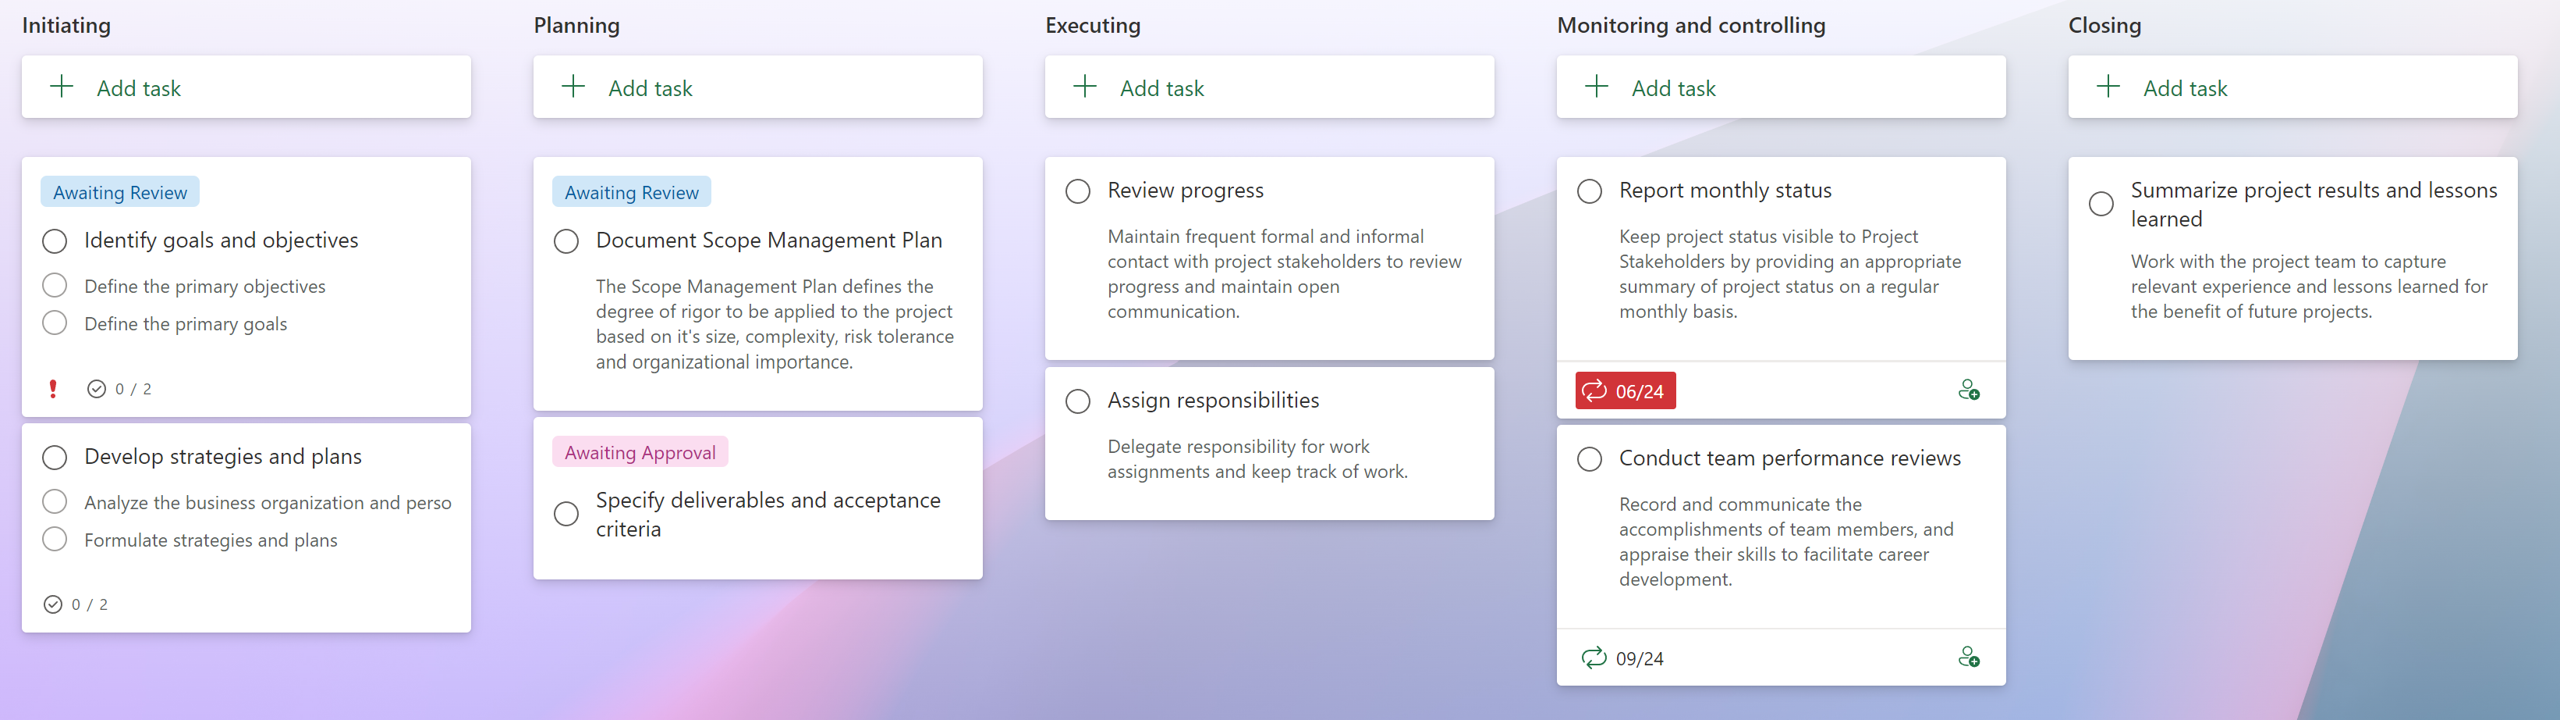
If you’re looking for a simple no-code way to get Microsoft Planner data, Power Automate is the way to go. We can create a scheduled flow that stores the data in a SharePoint Online path, then connect to that file with Power Query in Power BI or Excel!
Create a Scheduled Power Automate flow
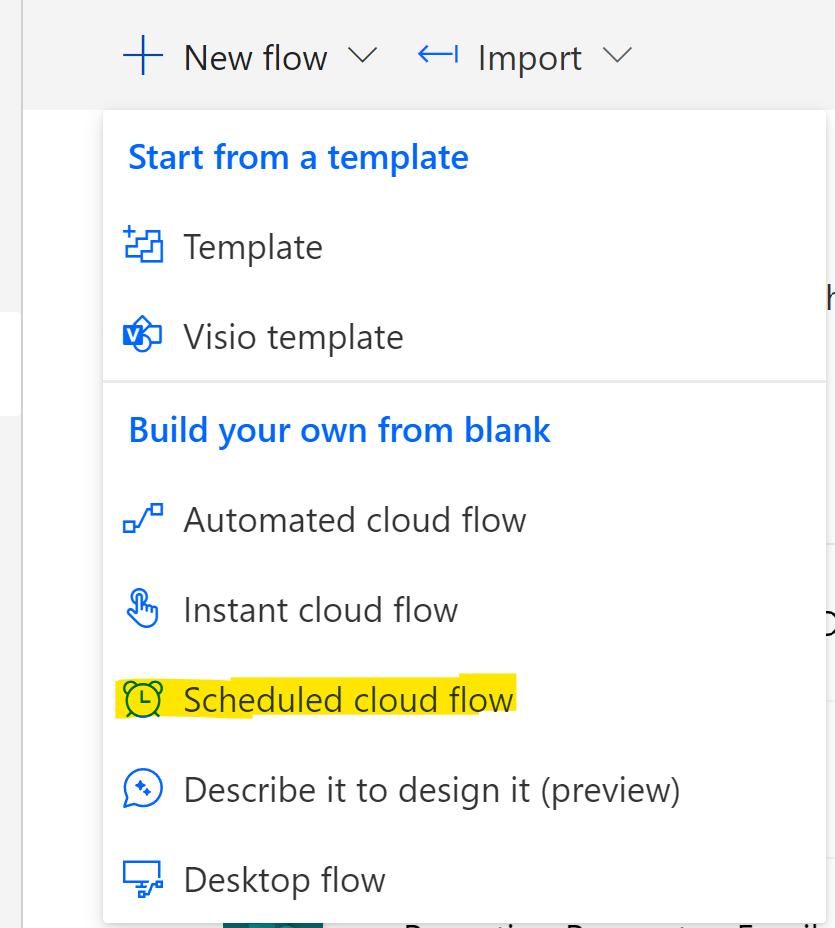
In the “New flow” menu, select “Scheduled cloud flow” and choose how often you want it to run. (Once per day is good, most of the time.)
Add a “List tasks” action
Next, add the “List tasks” action to your flow.
Careful, there are two actions with very similar names – don’t choose “List my tasks” unless you only want your own tasks.

Select the group and plan from the dropdown menus for the plan you want to get data for.
Add a “Create file” action
Next, add your second and final (YES final, this is a very simple flow!) step: “Create file”.
I’m choosing to create the file in SharePoint, but you could use OneDrive if you prefer.
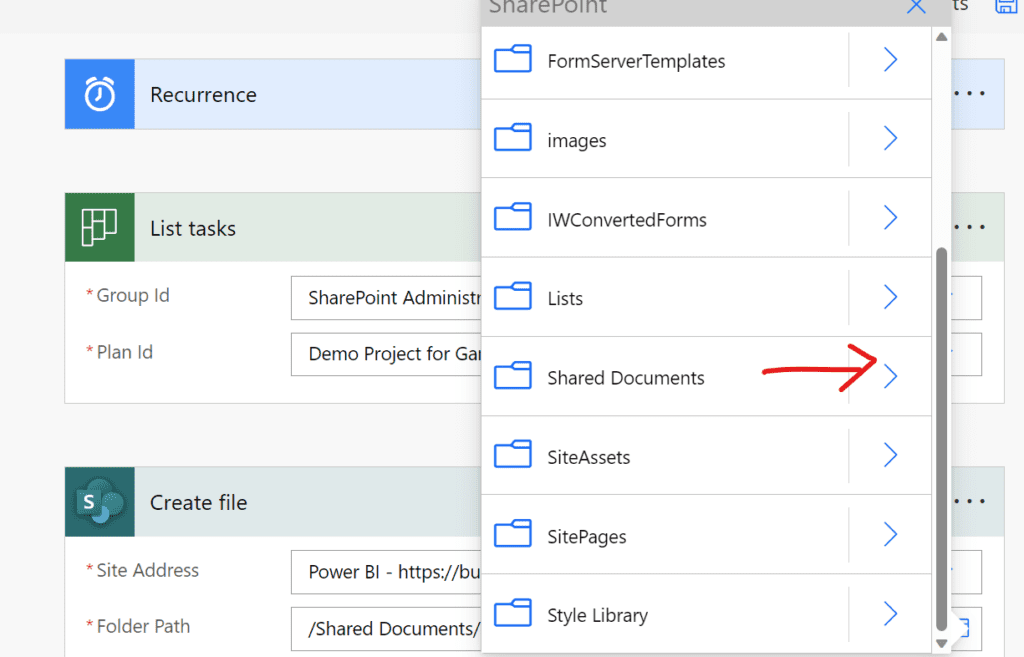
Select the folder in the SharePoint site where you want your Planner task data to be stored. If you select the folder icon next to the path field, you can click through the folders to get to the one you want.
If you’re using the default document library in a site, it’s typically the “Shared Documents” folder. Use the “>” symbol to open a folder, then click the folder name to select it.
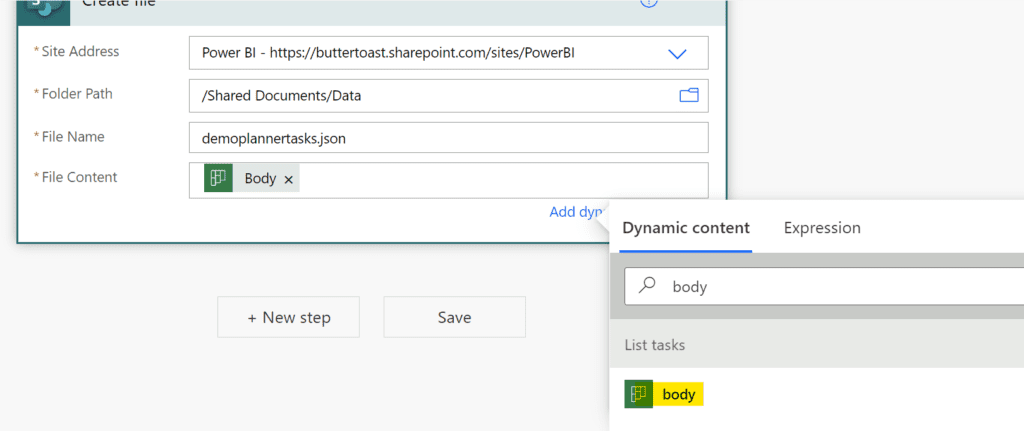
Give your file a name – this name will be the same each time the flow runs, so it will overwrite the file on a schedule. That way, when we connect to the file as a source, we can schedule refresh there and our report will update daily with the new data.
Your filename needs to end in .json.
We are creating a JSON file here because the “list tasks” step provides a JSON response, and the easiest file type to create with JSON is… JSON.
For example, my filename is:
demoplannertasks.jsonFor the file content, add the “Body” dynamic content from the first step.
Notably, “Body” does not appear by default as one of the items in the selector when you click into the field… as of the time of this post, you need to search for the word “Body” to get it to show up.
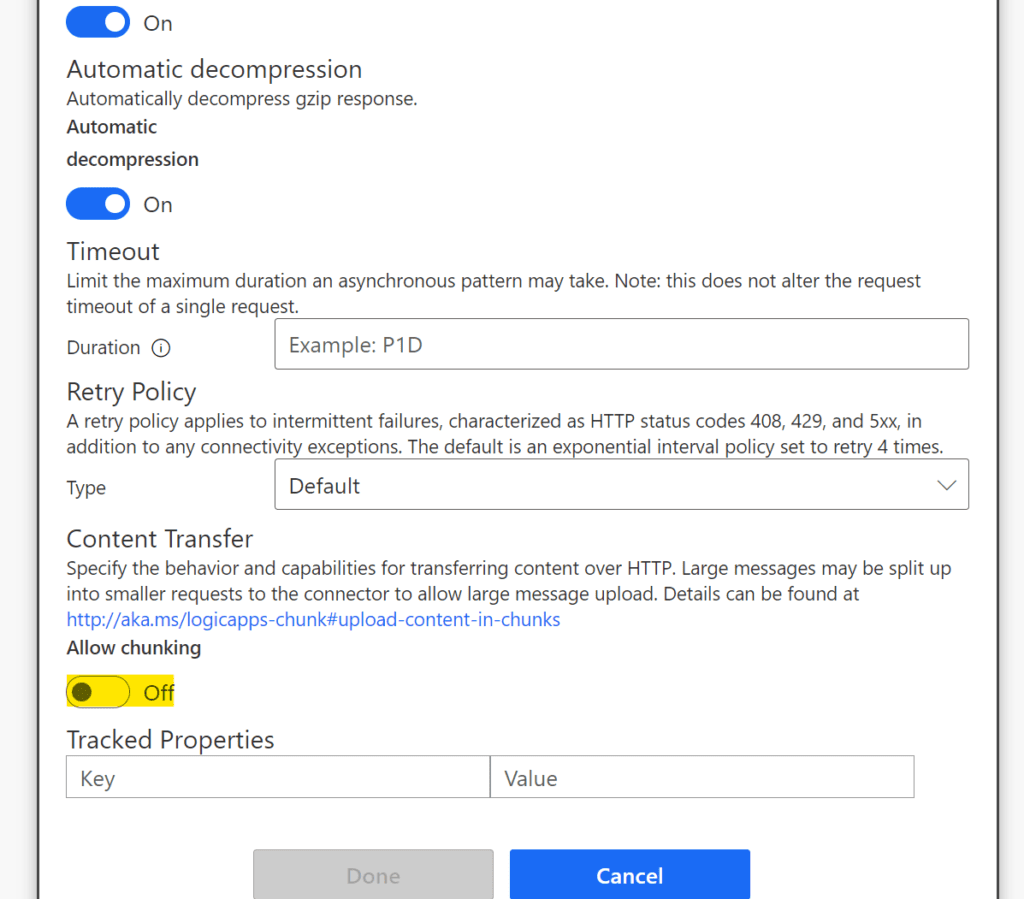
Turn off “Chunking”
This is a very important step.
Go to the ellipsis menu in the top right corner of the “Create file” action, select “Settings” and turn off “Chunking”. This will cause the step to replace the existing file when it runs instead of failing, which is what we want.
Save your flow and “Test” it to create the initial file
Use the “Test” button in the top right corner of the flow window to manually run the flow and create the initial file.
Need assignee names, buckets, subtasks or flags?
It’s a bit involved, I did a video on getting Planner detail data here.
Next, navigate to the SharePoint site that the file is stored in
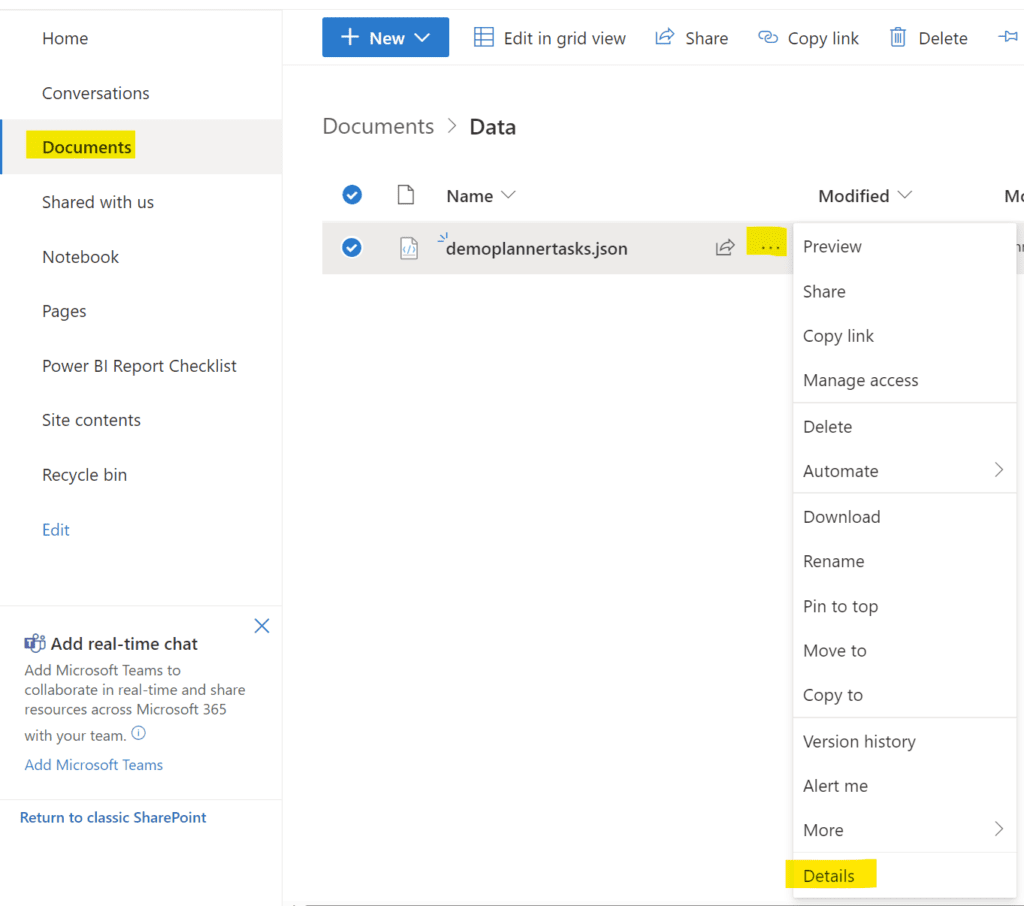
Assuming your flow ran successfully, navigate to your SharePoint site and into the document library it is stored in. Use a “real” document library path, typically the Documents link in the sidebar – the web part menu doesn’t have the menu option we need here.
Copy the true file path
Use the ellipsis menu next to your JSON file and select “Details” from the menu:
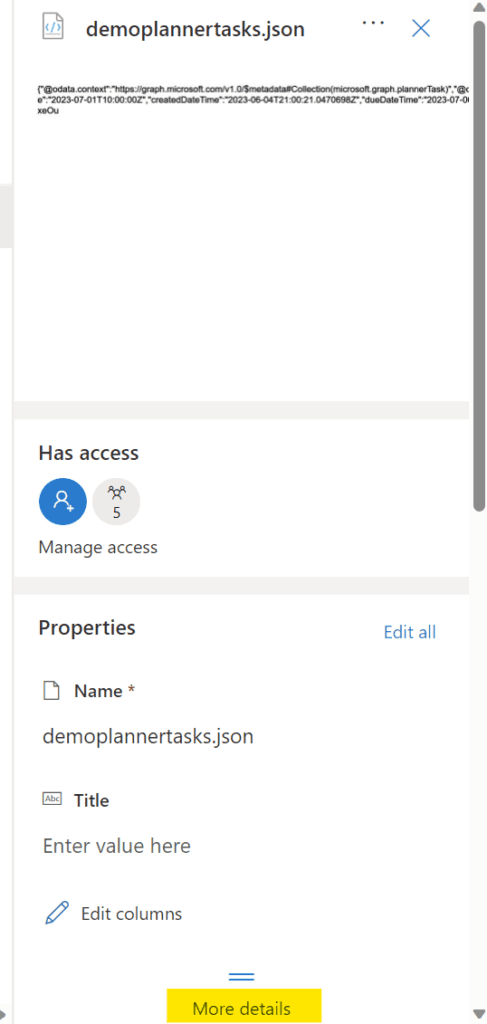
Under “Details”, select “More details” in the far bottom right:
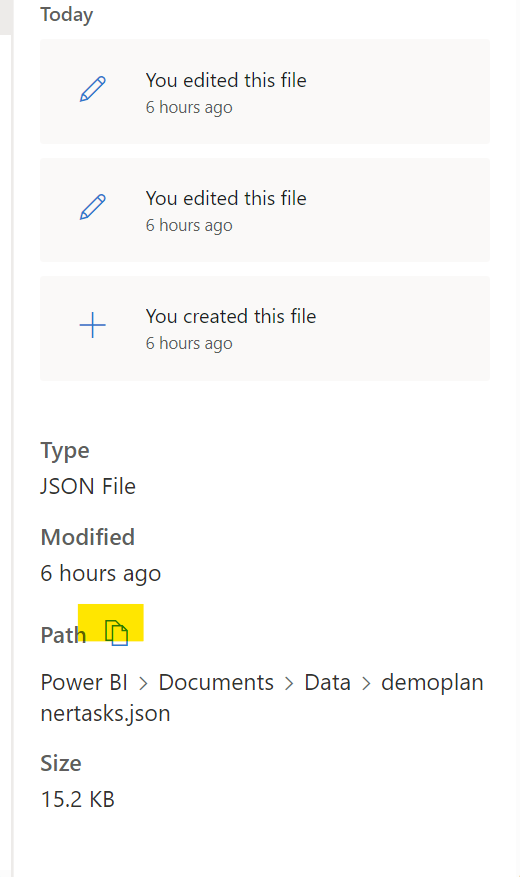
Click the file icon next to Path to copy the file path.
We are using this path instead of other methods because SharePoint has a tendency to create file preview or generated URLs for files that are not actually the literal path, and those won’t work for what we need.
Download the file
Next, download the file using the ellipsis menu next to it.
You might be wondering why we put it in SharePoint at all if we’re just going to download it – trust me, I’ll explain.
Connect to the file in Power BI or Power Query for Excel
Use your preferred tool – either PowerBI or Power Query in Excel – to connect to the file using the “Get data” menu.
Choose the “JSON” option (if you’re in Excel it’s in the “from file” menu, if you’re in Power BI you’ll have to select the “more options” to see it) and select the file we downloaded earlier.
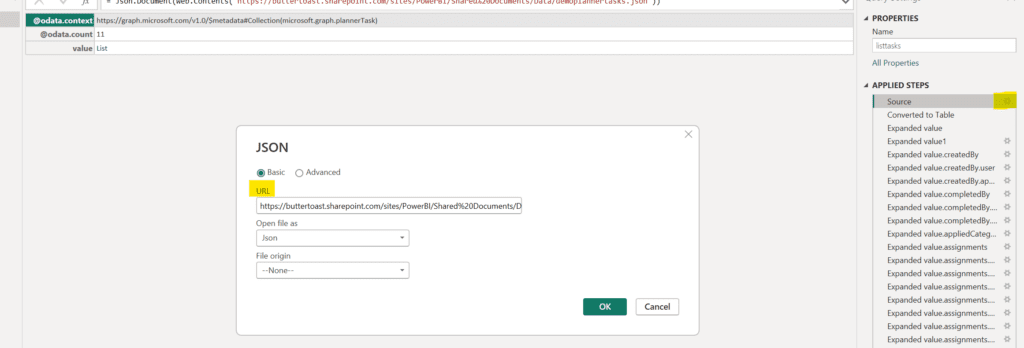
Now, update the path to point towards the SharePoint path(s) you copied earlier
There’s no “connect to single SharePoint file” connection option for connections, only SharePoint list and SharePoint folder, neither of which were a good fit here, so we used the file connector. Now, we need to change the path!
Open the Power Query window (called “Transform” in some menus) and click on the gear icon next to the Source step in the applied steps area. Erase the file path there and paste in the path you copied earlier and click OK:
It may ask you for credentials at this point – if it does, select the organizational account type from the left menu, sign in, and click Connect.
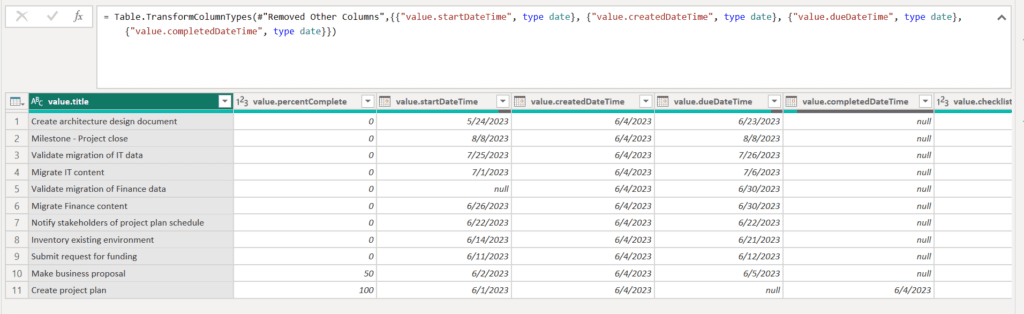
The JSON connector automatically expanded the rows of data for you so you should see your tasks with their titles, start, end, and completion dates. You might check and make sure that the expansion of the assignment fields didn’t cause row duplication (because a task can have multiple assignees). The assignment field in this case only has the assignee IDs anyways, not the names, so it’s not super useful – you could delete those steps, just make sure to update the “changed type” step as it references those fields (or delete the step and set your own types – you probably want the datetime fields to be date only anyway).
I like to select the columns I want to keep and do a “remove other columns” step to clean things up. Here’s what mine look like:
Now, to visualize
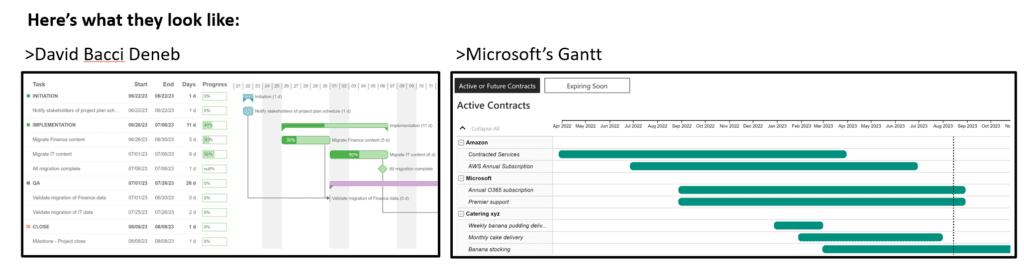
Gantt charts are the natural option for visualizing task data. I have videos on how to configure a couple of free options here:
How to use Microsoft’s Gantt custom visual
How to configure David Bacci’s Deneb template (this one allows for phases, dependencies, and milestones)
Last but not least, here’s how to schedule refresh for a cloud SharePoint source without a gateway.
What about getting ALL Plans?
You can get all your Planner tasks for all your plans in all your groups by using a series of loops!
Hello Ms. Payton,
I am a DoD user on the A365 Enterprise. I am using PowerBI desktop. I have created the Power Automate flow to create the .json file. When I attempt to change the path, the only two columns that I am able to get is the Name and Value columns. I do not see any of the “expanded” Applied Steps when I attempt to pull the .json file into PowerBI. Am I doing something wrong or is it due to being a DoD user that is creating this issue. SharePoint Online is where the .json file is being stored. Here is what the url looks like: https://******tenant***/teams/CONG_JFHQ-CO_JOC/Shared%20Documents/TFO-Tracking/opordTasks.json. Any suggestions?
Does the file you’re connecting to have the file extension .json? Make sure that the “create file” step has that file extension, and that you’re using the JSON file connector in Power BI. If those two things are true and you still don’t have the auto-expanded steps, you can likely expand them yourself – the column headers in Power Query should have an expand icon next to them so you can choose what to expand if your JSON is structured properly.