
A BIM file in Power BI holds information about the semantic model – tables, columns, measures, queries, etc. It doesn’t hold any data. You can generate a BIM file using Tabular Editor: Open a semantic model with Tabular Editor and choose “Save As” from the File menu to save a BIM file.
There’s a popular technique rolling around the internet to troubleshoot a model or to document it automatically by sending the BIM file to Chat GPT or other LLMs – e.g. Brian Julius’ post on LinkedIn.
There’s a lot of potential with this sort of thing, and it got me thinking – can we put this into a Power Automate flow, to create documentation for all reports in a workspace? That would let us simply re-trigger it periodically to update the documentation. The first thing I ran into with this is the token limit – even a small BIM will exceed token limits for most models, particularly if you’re not using a preview/new model. I checked the tokens in my example BIM and it was 120,000, which is a LOT. I’ll be looking into chunking it and recombining the outputs, but in the meantime I thought perhaps it’d be useful to simply import the file into the report to take a look at it, because the file is structured JSON and Power BI can use JSON as a source.
We can use the data about the model directly as tables in the report vs having GPT summarize it – it’s almost as useful that way, in many respects, because we can sort/filter/manipulate, and unlike GPT it won’t hit an output limit and leave things out.
I want to point out here that a lot of this model data is also available in the Power BI Admin API; but if you’re not in a position to be doing data engineering, the BIM file can be a lighter-weight approach.
There’s also the new “INFO” DAX measures, but as of right now when you use those you have to copy/paste the results into your own table, it won’t return it anywhere except the query view otherwise. Hopefully this changes in the future!
Okay, back to the BIM JSON. Save your model BIM first by opening the model in Tabular Editor – I believe this will work with the free version as well.
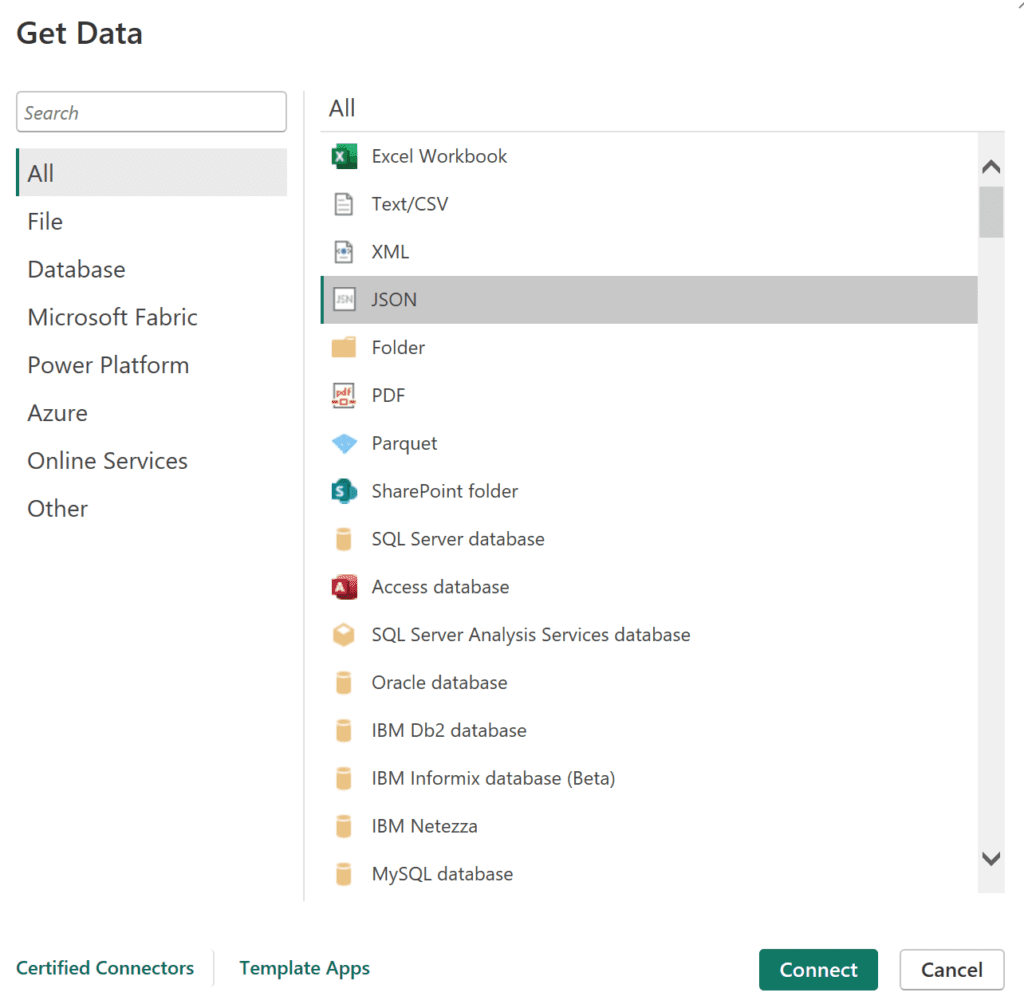
Step 1: Connect with the JSON connector (or folder) in Power BI
The BIM file isn’t a .json extension, though, so you won’t see your file by default when you go to import it. You need to change the filename filter to “all files”, then select the .bim.
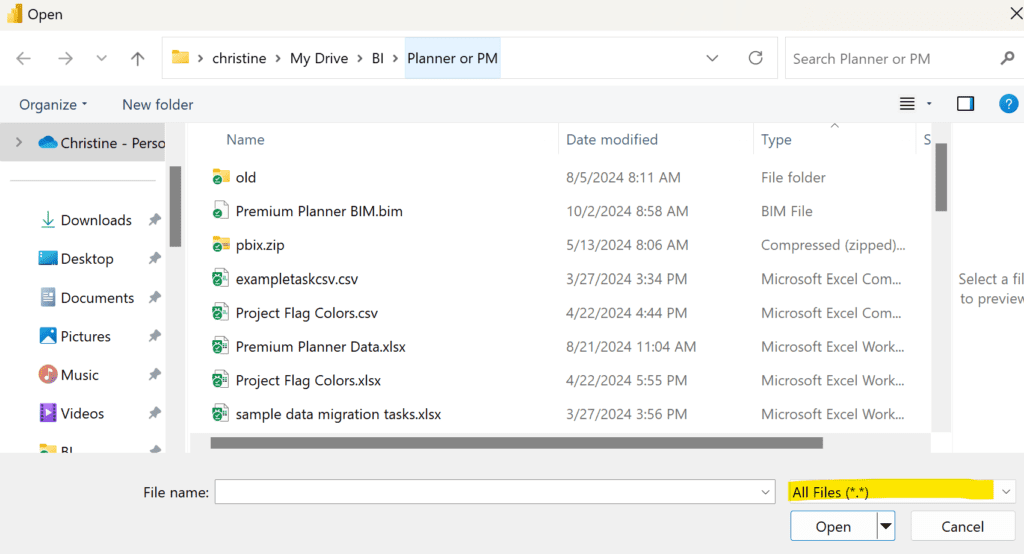
It would also work to use the folder connector (or SharePoint folder), if you were wanting to pull a bunch of BIM together into a model for higher-level reporting – if you go this route, make sure to filter the query on the .bim extension first before expanding. Brian Julius has code to extract the BIM for a whole folder of PBIX here.
Expand the JSON
It starts out looking like the screenshot below. You could make this dimensional if you wanted to, splitting the tables, measures, etc into their own tables. I like to split out measures and table columns into their own tables at a minimum; those are usually the two biggies that people want to see. You could get fancy and have a tables dimension also, and relate them all.

Start expanding “tables”, since they’re the backbone of the model. You need to expand down a couple of times to get to them. Note that when you expand, it won’t show all the properties to expand by default – you have to select “load more” to get them all.
Getting column names, types, format, and descriptions
If you expand the “columns” column a couple times as well, you’ll get the column names and descriptions. It actually shows you the column name in the source vs the name in the report if you’ve renamed it, which is nice. Here’s what mine looks like. IMO the true value here is being able to show column descriptions to your viewers; this is a wholly underutilized feature because it’s not typically surfaced to people who are not report builders currently:

Relationships are in here too, though I err on the side of just screenshotting the model view and toggling the option to “pin relationship columns to top of table” option for a more visual representation. The relationships don’t change very often once development is complete, so it’s not super difficult to maintain.
Getting measure expressions and descriptions
I like to put measures in their own table, separate from the table columns – it makes them easier to work with. You can right-click the query and duplicate it for this, and remove the column expansion steps. You will want to keep the table names, because that’s useful.
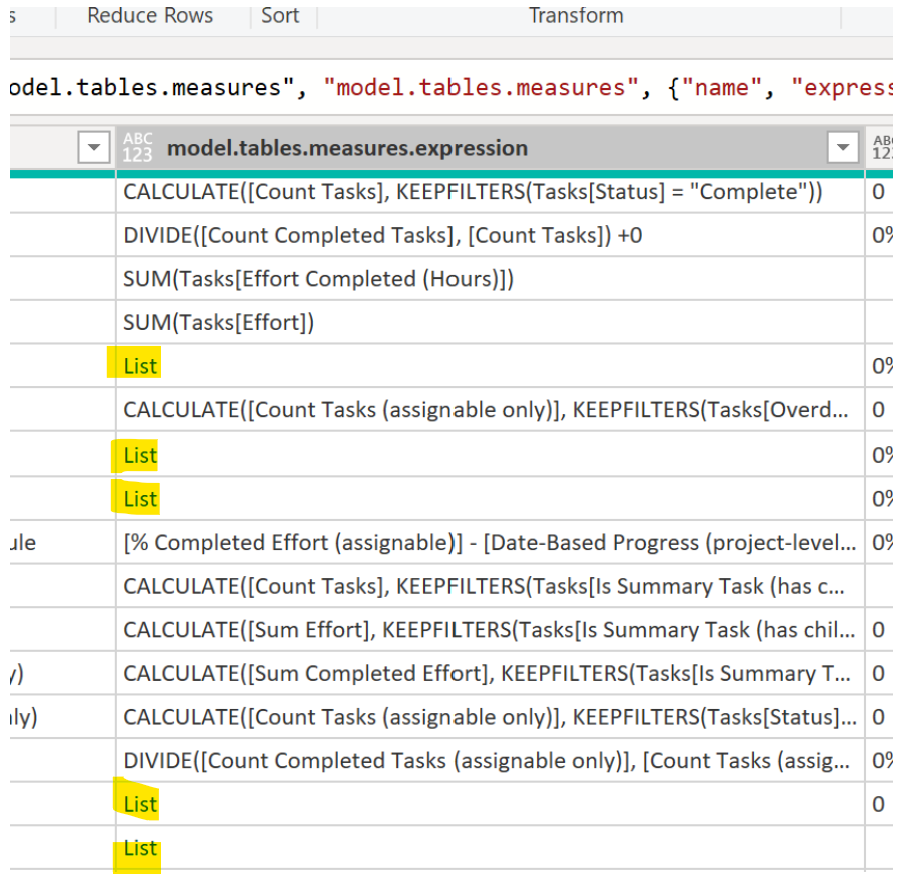
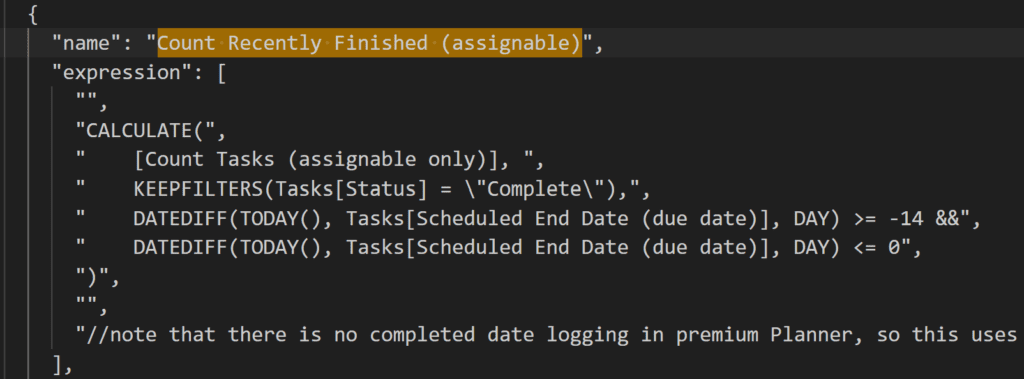
Measures expand oddly. The line breaks inside the measure expressions cause the multiple lines of the measure to be read as separate items, meaning when you try to expand you end up with some weird behavior:
Here’s where it’s coming from in the BIM. Note the double quotes around each line inside the expression – those are the list “rows”.
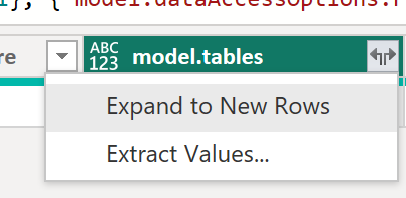
A workaround for this in Power Query is to just expand the top level of measures to “model.tables.measures.expression” (you can also expand the measure names, they don’t have this issue) to look like the screenshot above, then add a custom column to handle the measures with multiple lines:
if Value.Is([model.tables.measures.expression], type list) then
    Text.Combine(List.Transform([model.tables.measures.expression], each Text.From(_))) else [model.tables.measures.expression]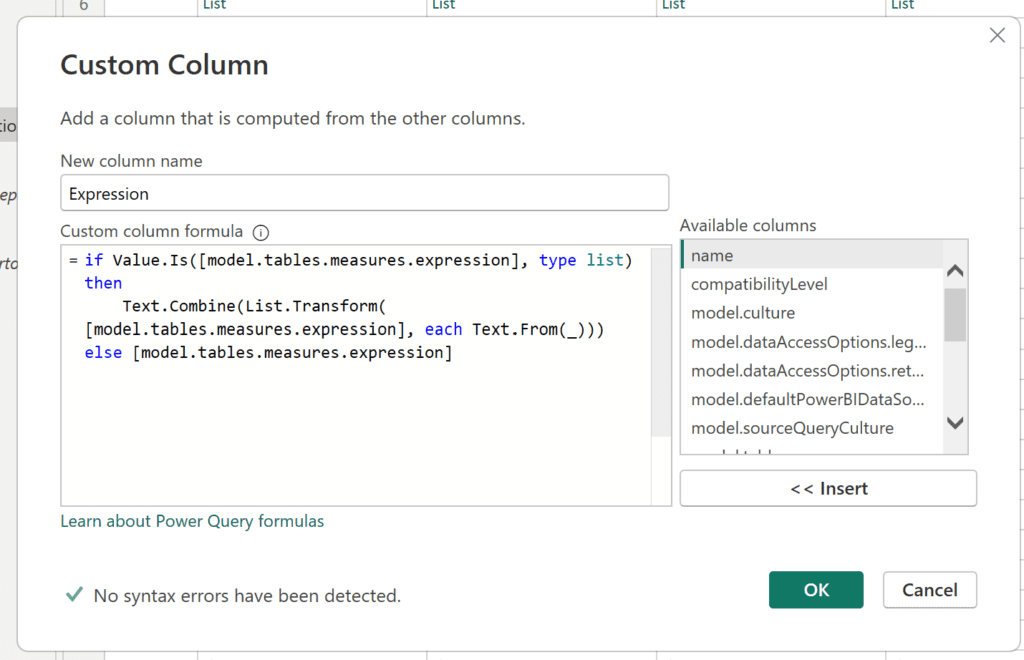
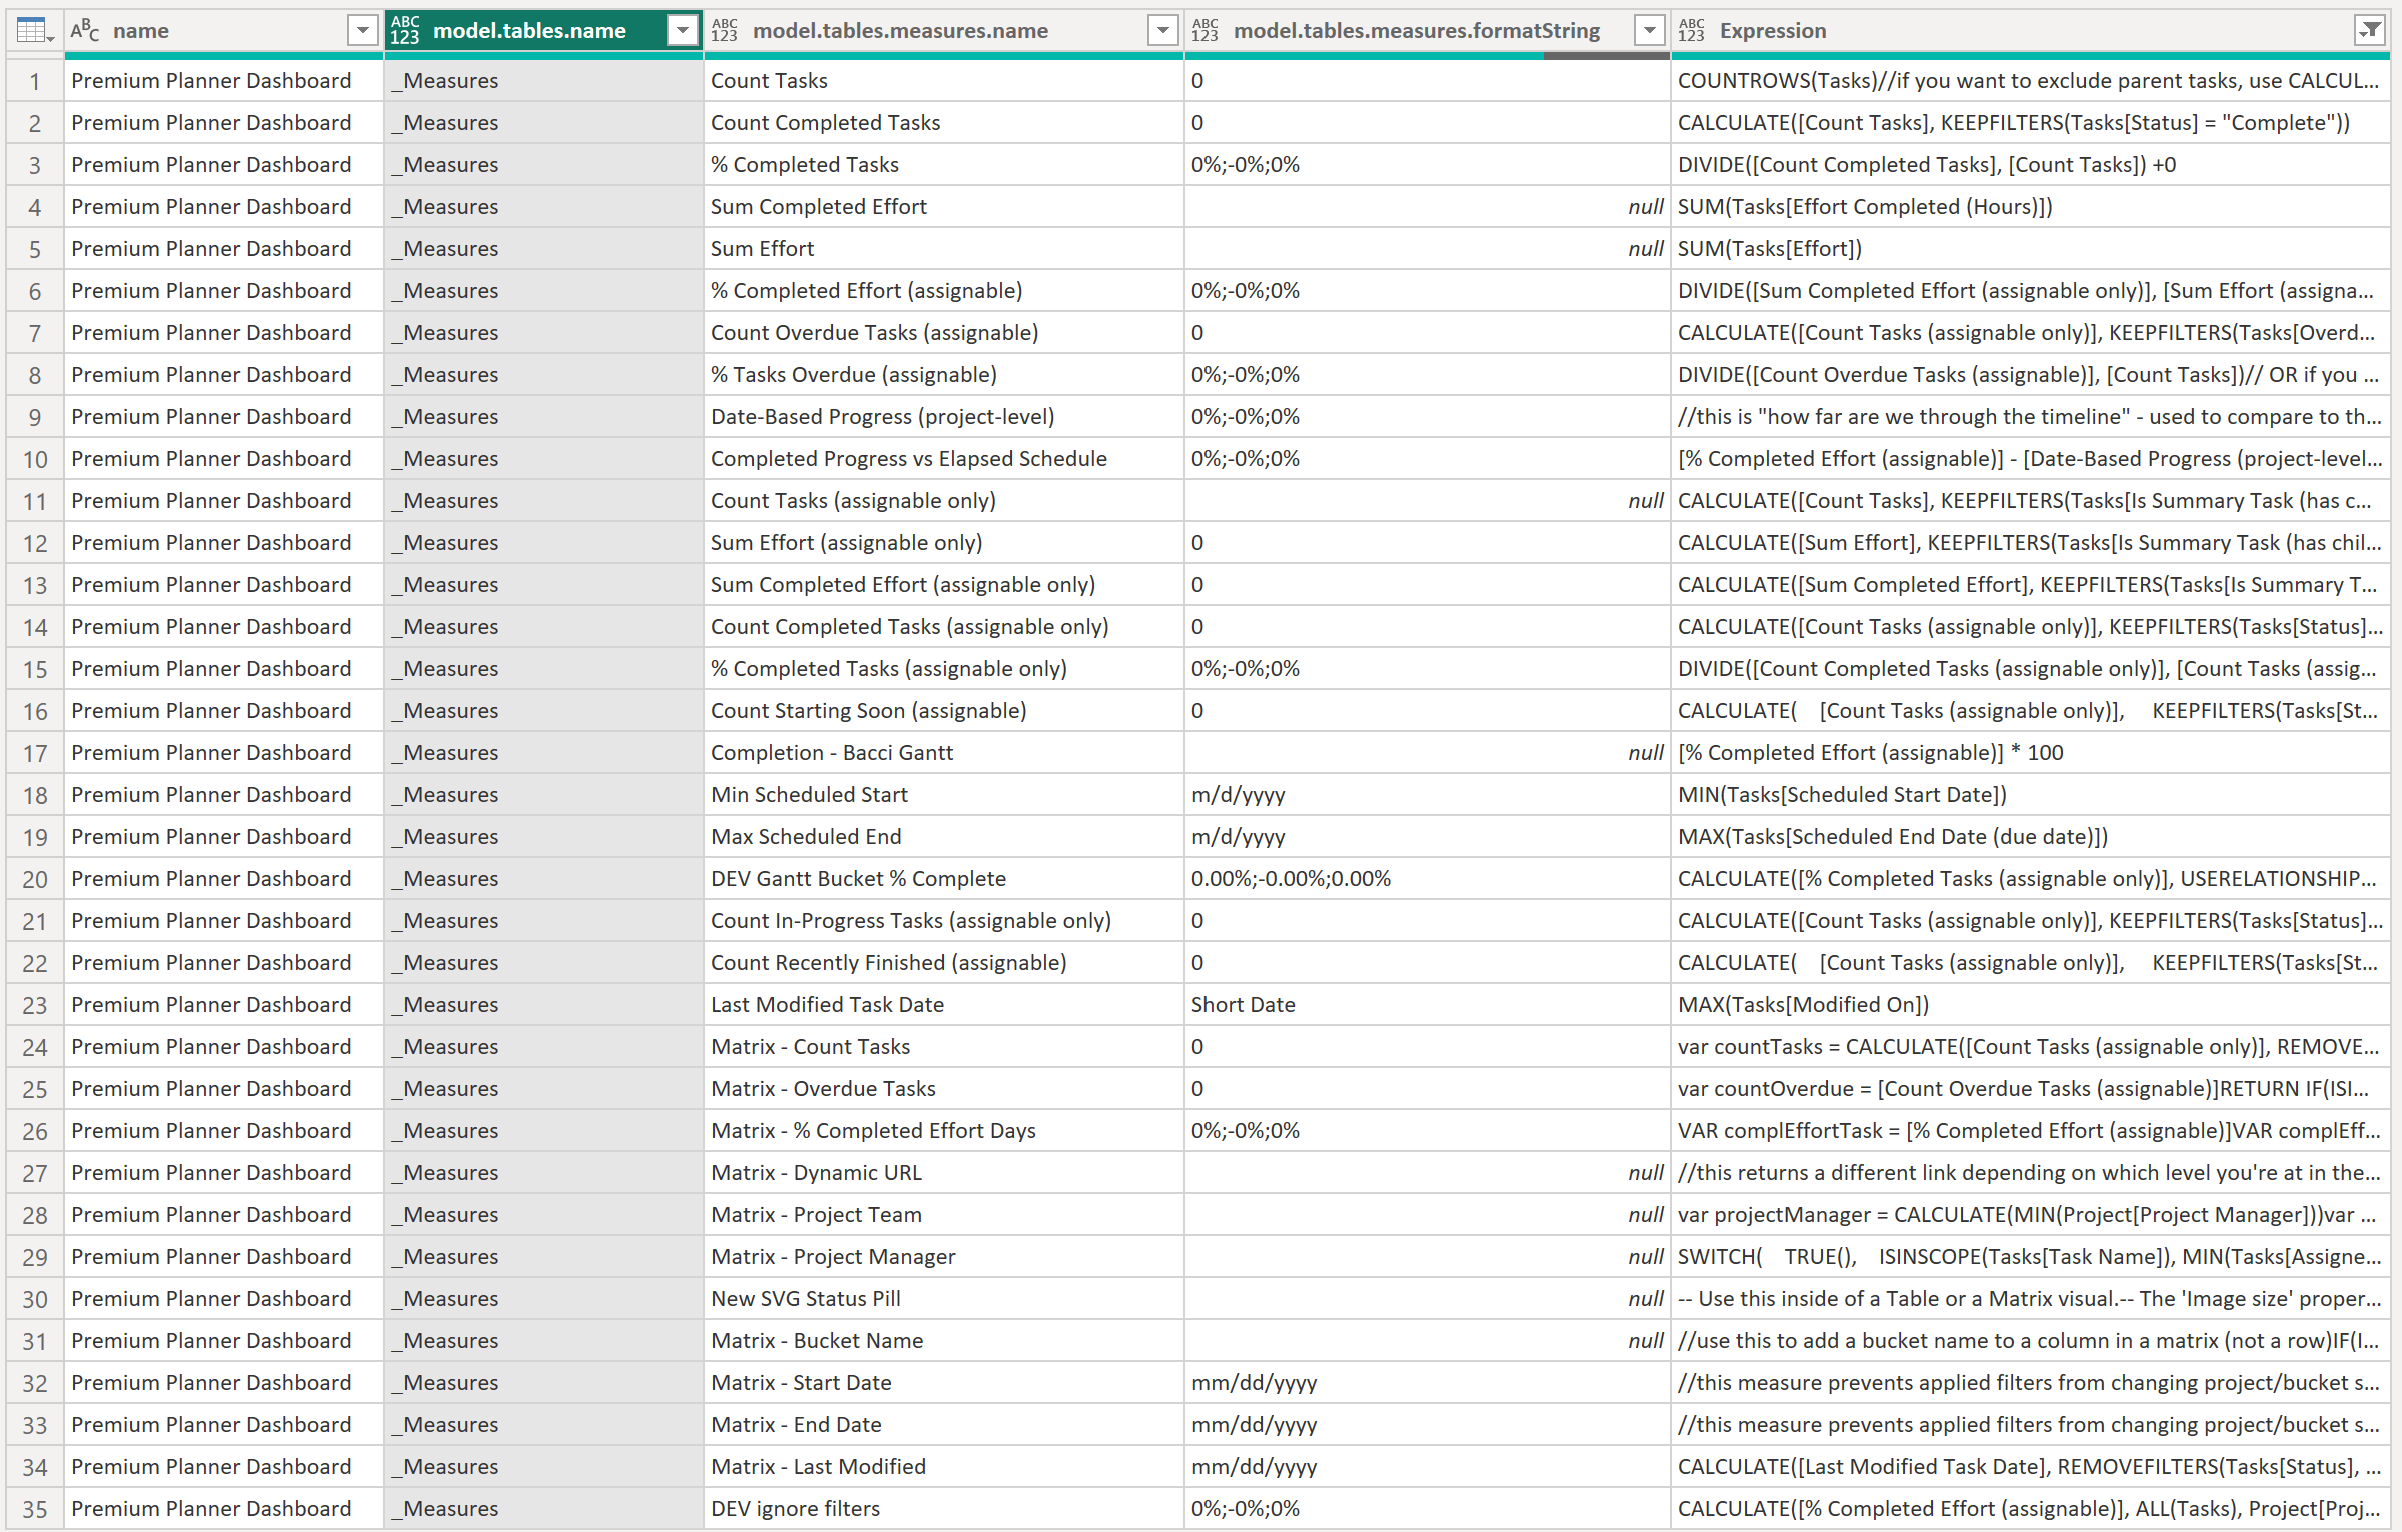
Next you can remove blanks on the expression column you just added; this takes out the tables that have no measures to clean up the query.
Wrap it up in a report page with visuals!
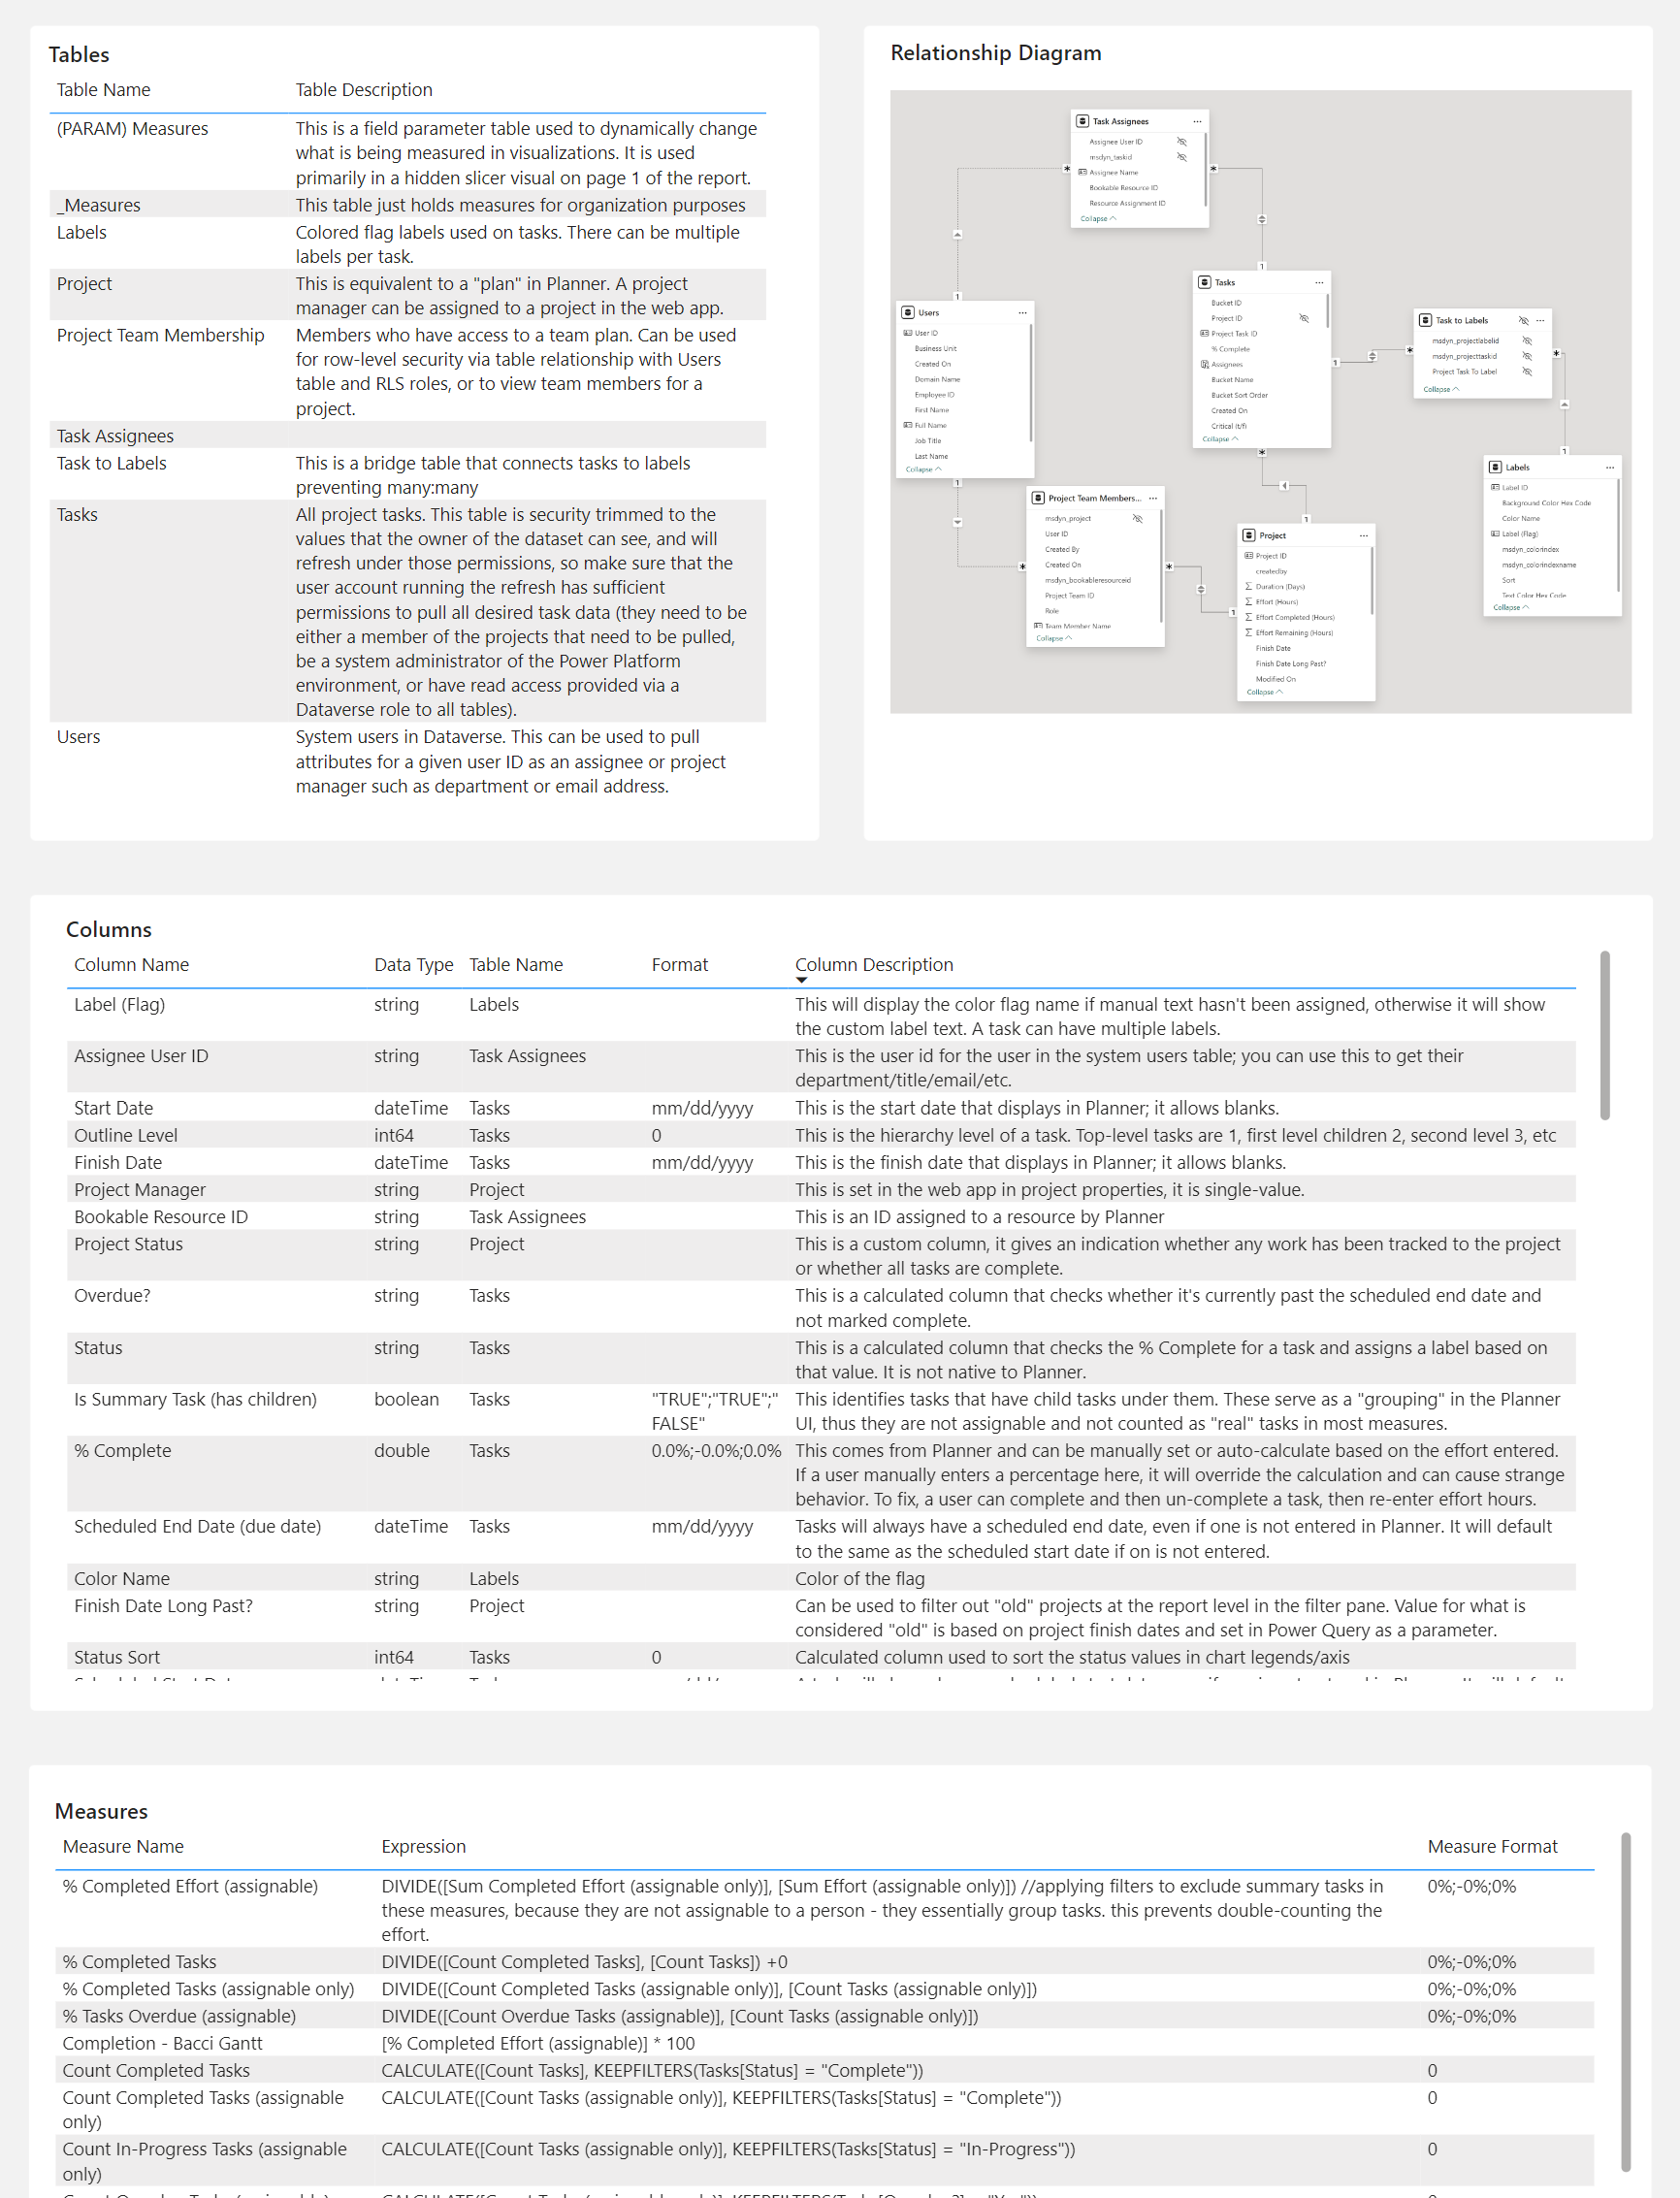
We can now show our report viewers our column/table descriptions, types, and measure expressions! Let’s drop fields from our tables into some visuals. You can filter out things based on table name or measure folder to exclude things you don’t want people to see also.
Here’s what the finished report “documentation” tab looks like:
I would recommend right-clicking and disabling refresh on these tables unless you plan on putting them in SharePoint and re-generating the BIM on some cadence.
That’s everything! If you decide to refresh this, just re-generate the BIM to overwrite the existing one, then refresh the tables. If you’ve turned off refresh in the query, you can still refresh from the desktop editor in the report view by right clicking on the table there – it’ll let you refresh individual tables. If you want to get fancy, you could store the BIM in SharePoint, update the reference to the SharePoint location, and schedule refresh – just keep in mind the BIM will only update if you update it yourself.
UPDATE: I created a video tutorial that covers how to query model metadata in the Power BI service.
Extensibility
The neat thing about the BIM files is that they have a consistent format. What that means, is, you can simply copy/paste your BIM query into a new report and change the source path to a new BIM file without having to recreate all the query steps. Since the table and column names would be the same, you could probably even copy/paste over the configured visuals between reports (I haven’t verified this yet, but it’s plausible).