
Want to use Claude in your apps and flows in Power Platform? Fortunately, Microsoft allows you to create your own custom connectors, and it’s fairly quick to do. This same process will work for other LLMs (e.g. Azure OpenAI), too, with just a few tweaks.
When you create custom connector, put some thought into how you structure it – e.g. do you want people using it to be able to select their model version? You can make a dropdown for this in the UI. Let’s start from the beginning.
Step 1 – Create the connector
If you’ve never made a custom connector for, there’s about a 90% chance you won’t be able to find the place to do it without running a Google search: it’s buried. Go to either the Power Apps or Power Automate maker portal (make.powerapps.com) and then select “… More” in the sidebar and then “Discover all”.
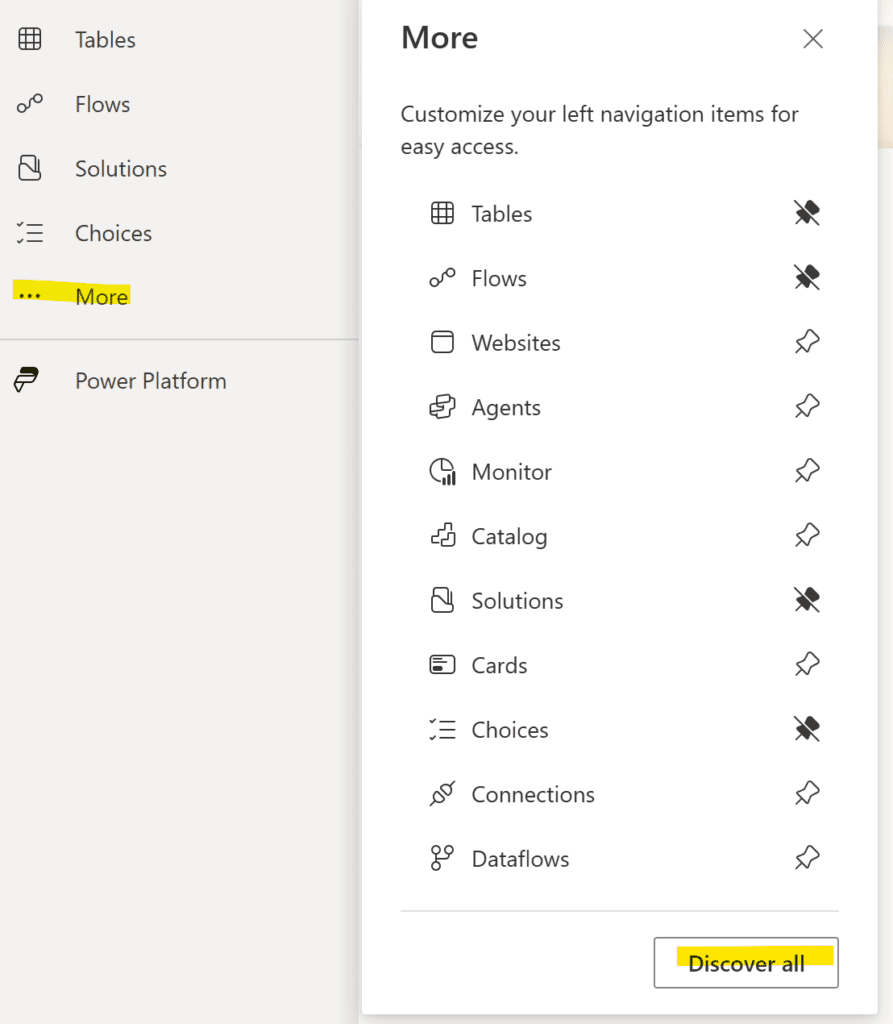
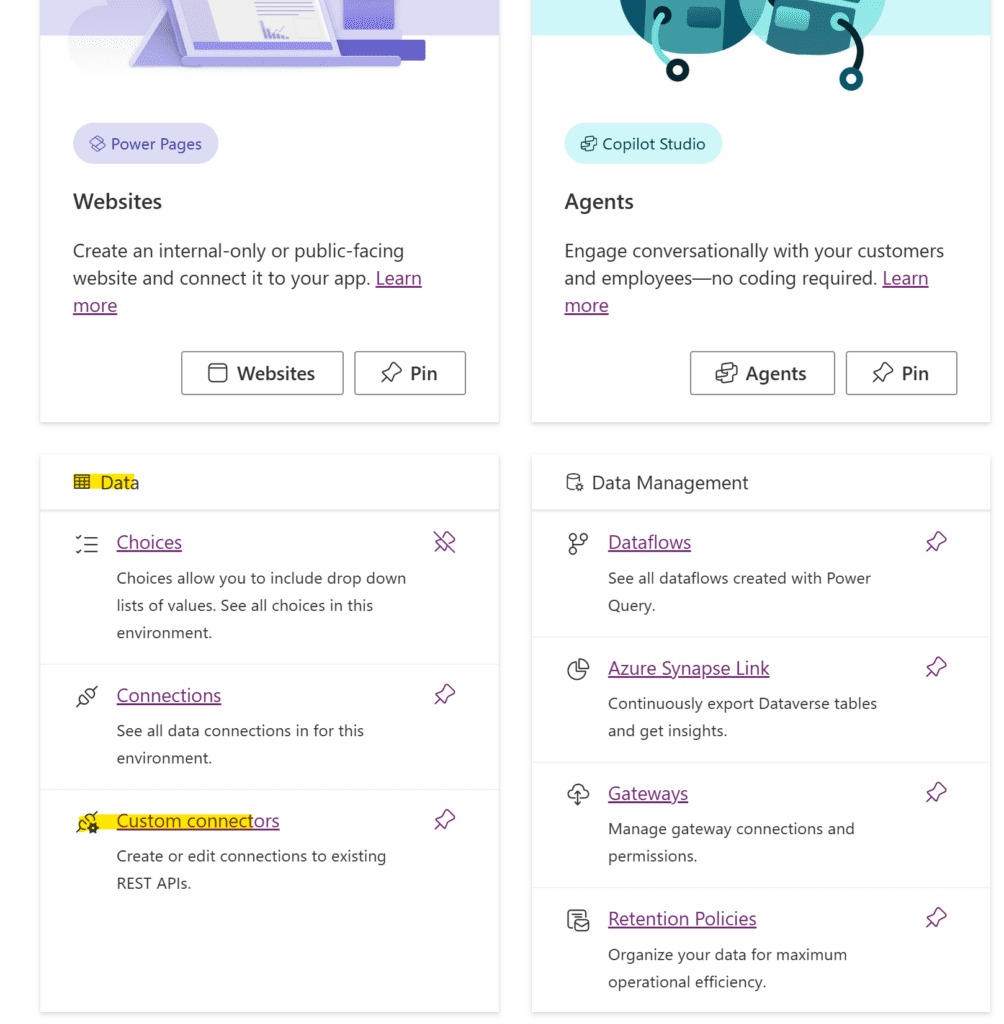
From here, custom connectors are in the “Data” section.
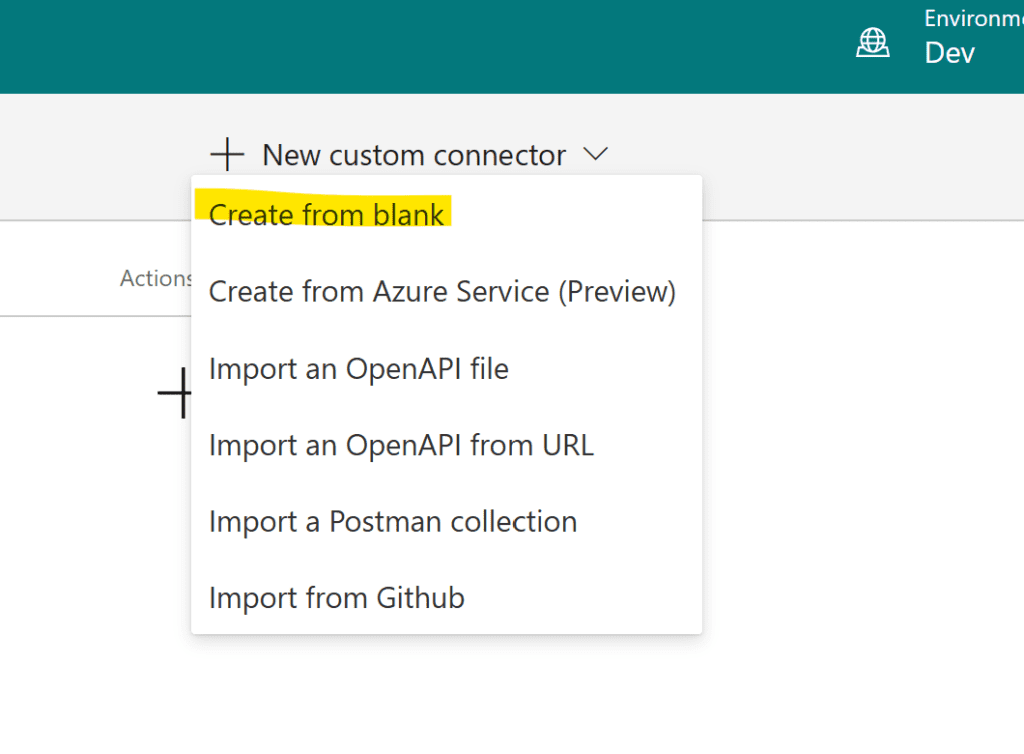
Create a new blank custom connector from the top ribbon menu:
Give your connector a name. Don’t use symbols or punctuation. I tried to call my connector Claude.ai, and the period made the “continue” button do… nothing. There was no error, it just did nothing and could not continue, so don’t use periods. Spaces are OK. I don’t think you can change the name later, so don’t call it “Claude Test” or similar. 😄
The description also has to be greater than 30 characters, but it won’t tell you that until you get to the very last step, so just make it verbose!
Step 2 – Initial configuration
Choose an icon and set the host URL. The host info can be found in the API documentation (e.g. the “getting started” page), it’s api.anthropic.com. Use HTTPS.
You can leave the base URL blank – the full URL that it uses will be set in the action settings.
Add a thumbnail! I plopped the Claude logo on a white square – you can download this to use if you want to, or use your own.
Step 3 – Authentication
Authentication type should be API key.

You need an API key to actually use your connector – so make sure to generate one in your Anthropic console. It’s straightforward, there’s a button for it, keep it somewhere safe. We don’t input it on this screen, though, that comes later – this is just setting up the structure it’s sent with.
The parameter name needs to be x-api-key (this comes from the documentation), you can label it however you want. Click “Definition” to move to the next screen.
Step 4 – Action configuration
The actions hold the structure of how you want people to interact with your API. This is something you will want to set up once, and not fiddle with later. If you change the structure of your action substantially down the road, you’ll probably break all your connected flows (this is why Microsoft has connector v1, v2, v3, etc when you search by name – they just make a new one each time they have major changes).
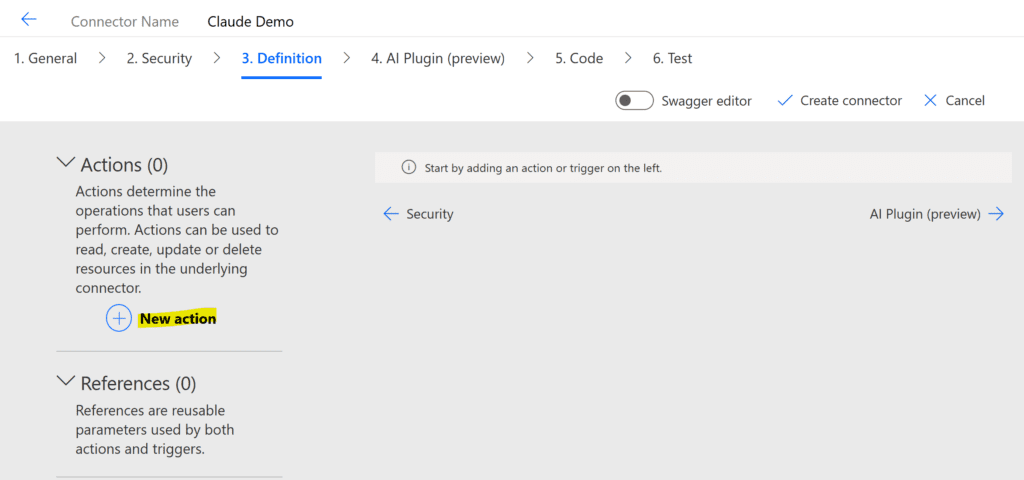
You can create multiple actions in the connector if you want people to be able to use it various ways – e.g. you could have one action that allows users to input a system message, and another that’s “baked in”. We’ll just do one for an example.
Chose “New action”
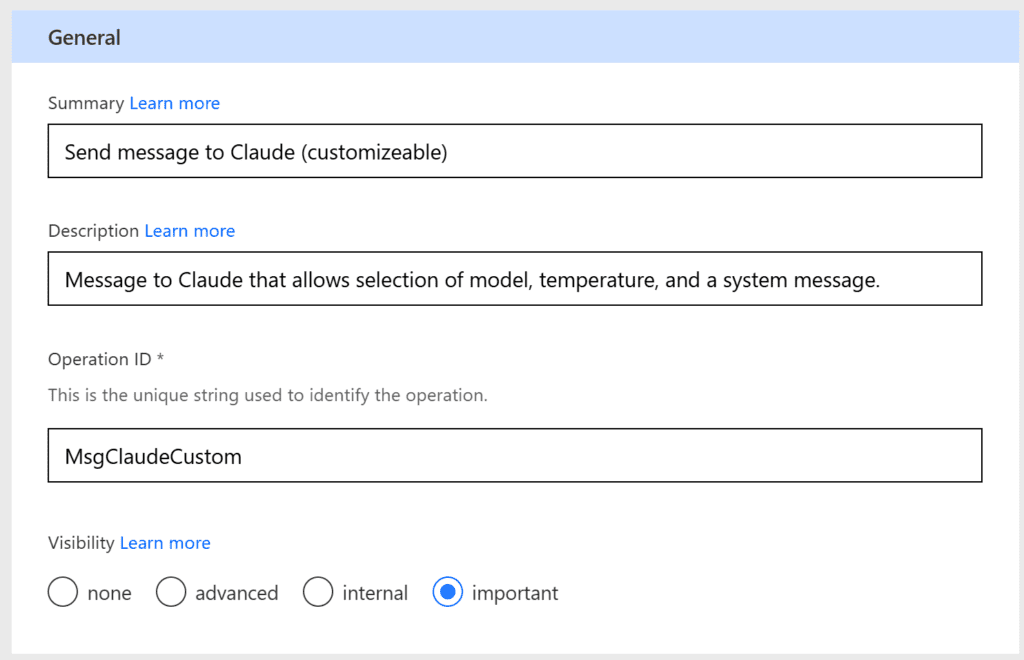
Give it a name and description. Visibility “important” means “not buried under a submenu”. If I had to guess, this is probably why the connector sorting is broken in the new Power Automate UI – everyone sets their connector to “important” so it doesn’t get collapsed in a submenu, and when everything is important, nothing is important… so it goes. 🤣
Step 5 – Import a sample request & configure
This is what determines which fields your user is presented with in the Power Automate UI. The structure of your sample matters – if you import the ultra-basic example from the Anthropic “getting started” page, your inputs will also be ultra-basic.
You can either pull the sample code from the documentation, or you can do what I did and ask Claude to generate example request JSON for the parameters you want (e.g. temperature, model, system message, user message).
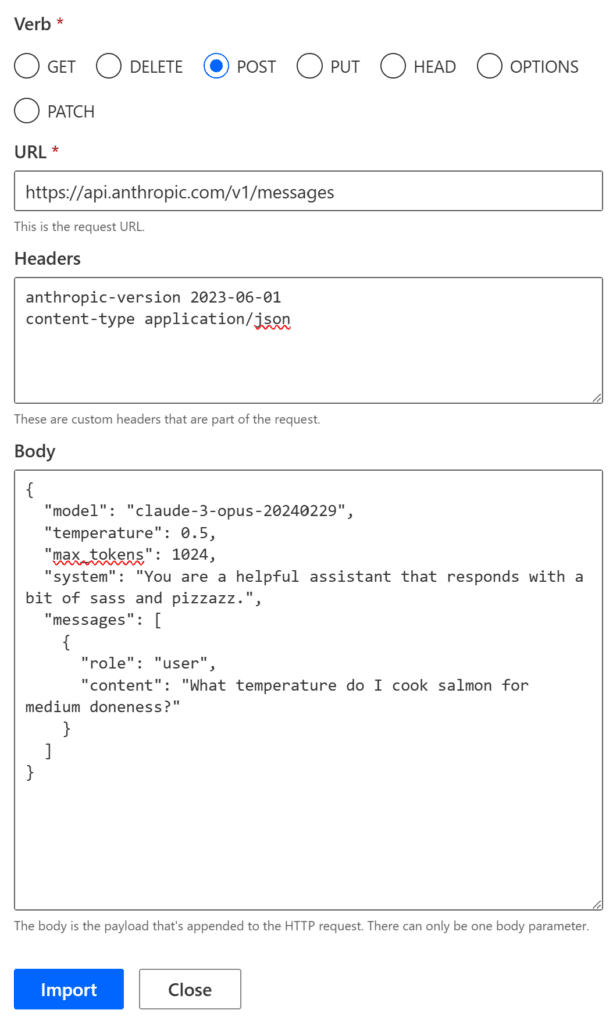
Verb should be POST (because we are sending the message to Claude). The URL and headers we get from the documentation “getting started” page, though for the connector we want one header per line and no colon separator – just a space between the name and value. See below.
URL: https://api.anthropic.com/v1/messages
Headers:
anthropic-version 2023-06-01
content-type application/json
Body (generated by Claude below, the actual values don’t matter here, just the structure).
{
  "model": "claude-3-opus-20240229",
  "temperature": 0.5,
  "max_tokens": 1024,
  "system": "You are a helpful assistant that responds with a bit of sass and pizzazz.",
  "messages": [
    {
      "role": "user",
      "content": "What temperature do I cook salmon for medium doneness?"
    }
  ]
}
Here’s what it looks like:
This example action is for text content, but you could also do images with the structure outlined here.
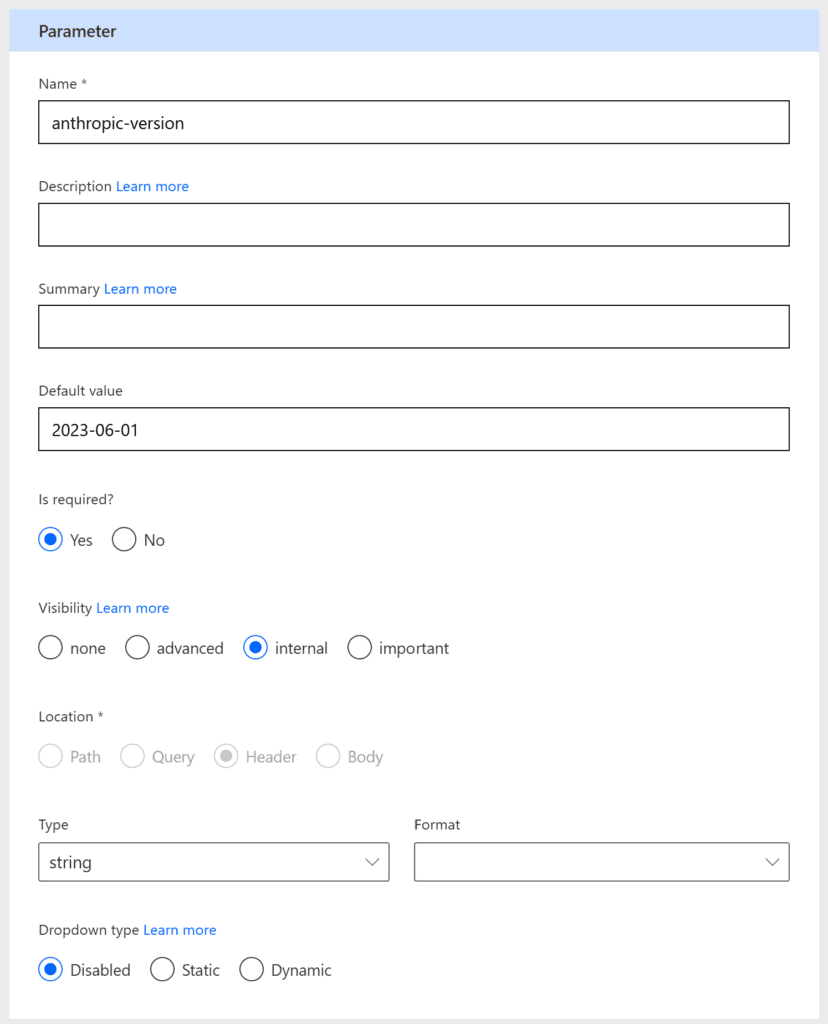
That import action gave us some cards in the UI for our headers and body, but it unhelpfully didn’t import the values as default values, so we need to go through and fill them in. Take this opportunity to make things that should be required required (e.g. headers, version, message, max_tokens).
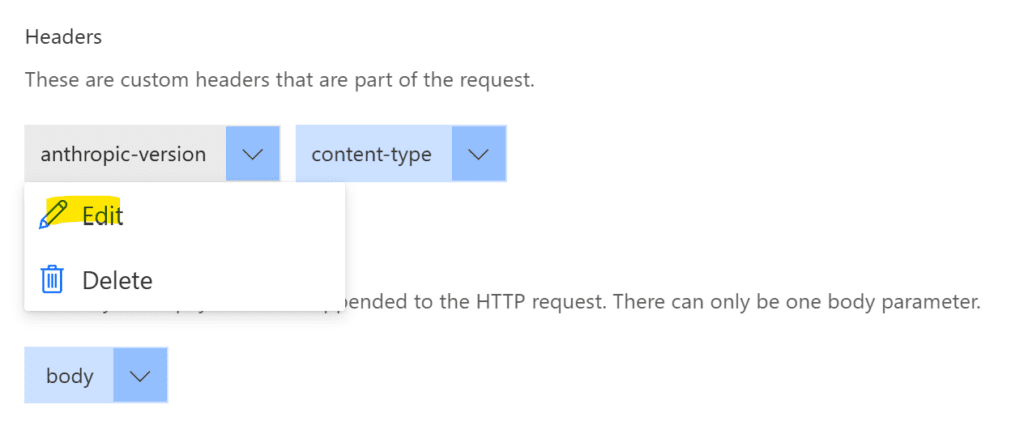
Set the things that you don’t want people to modify, like the headers, to “Internal” also – that makes it so they won’t see them but they will still be sent in the call.

These parameter cards are nested, so when we go to edit the body card, we get a bunch of cards under that that we can modify. Body should obviously be required, but it also needs to be important so that people can see it to modify things like the message.
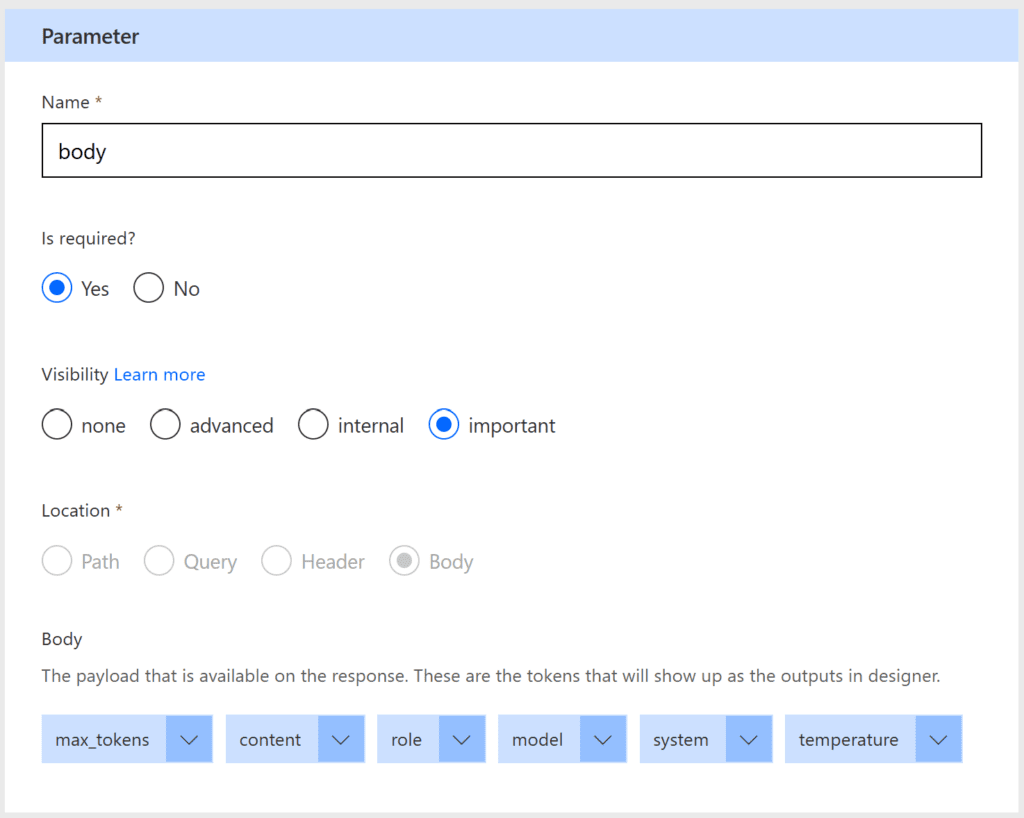
Next we need to configure the sub-cards of the body.
Content is the message that gets sent, so make that required, important, and you can give it a friendlier title like “Message” if you want to.
For role set the default to user, make it required and internal so that it can’t be modified.
max_tokens is tricky – it should be required, but there is no option to set a min/max value in the UI. According to Claude, 1024 is a typical value, so I’ll set this as the default and tell the user what the max is in the description. The allowed max varies by model, where Claude 3.7 is 4096 but can go much higher with “special beta headers”. This parameter is used to limit cost, it represents the generated output size.
For model, it’s required, but we can choose whether we want to hard code a default value and make it internal, or whether it should be “important” and give static dropdown values. For me, I like to try prompts on different models, so I’m going to do the latter. You can get the possible values for models here (it even tells you which is good for what). The older versions are usually less expensive per call.
The dropdown wants the models as comma-separated values, here’s my list for easy copy/pasting:
claude-3-7-sonnet-20250219,claude-3-7-sonnet-latest,claude-3-5-haiku-20241022,claude-3-5-haiku-latest,claude-3-5-sonnet-20241022,claude-3-5-sonnet-latest,claude-3-opus-20240229,claude-3-opus-latestMy assumption with the “-latest” models is that it will auto-roll up to new versions without having to update your connector. This can be a good thing or a bad thing depending on how consistent you need your outputs to be.
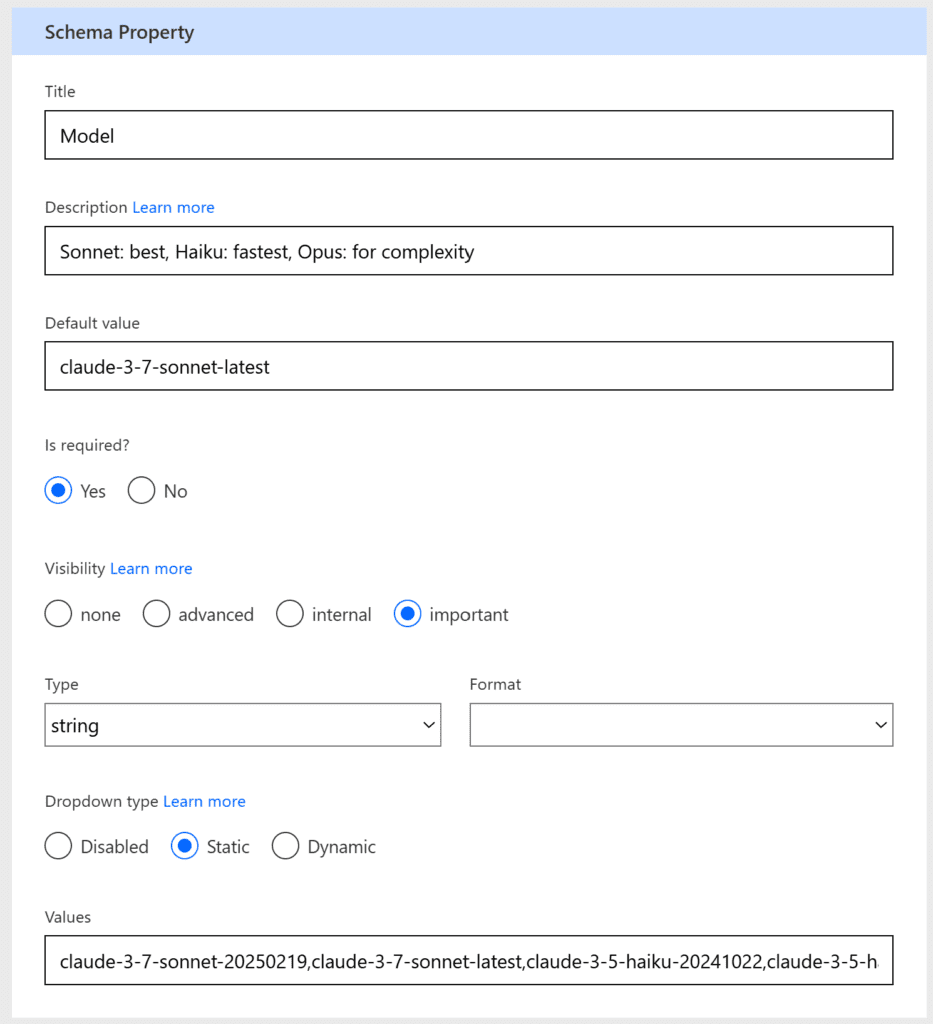
The “description” box is text that shows up literally inside the field that the user sees – there’s not much space there, so if you decide to add descriptions, keep it short.
Temperature and system are optional. Temperature is between 0 and 1, where 0 is more predictable and 1 is more creative/variable. System is the system message, so special instructions on the back end if you want people to have Claude always talk like a pirate or something.
When you’re done configuring the parameters, click “create connector.”

Test the connector
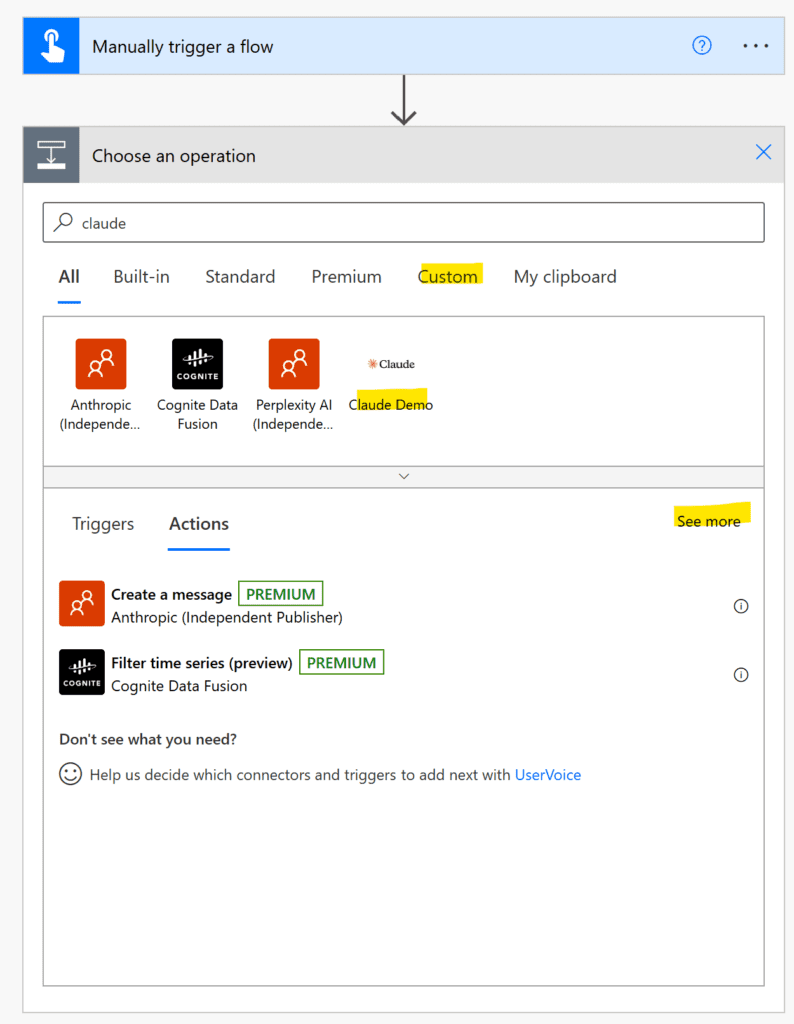
I like to test the connector in a manual trigger flow so that I can see what the end-user will see. Make sure that you’re in the same environment as the one you created the connector in when you go to the Power Automate portal – it’s in the top right in the toolbar (mine defaulted to a different environment).
Create a new manual flow there and add your action (you can search for it by name). When I searched for “claude” it didn’t show up in the modern UI, initially. When I swapped to classic, and clicked on “see more”, it did show up there. If you have some trouble finding it, just wait a while and try again!
Then we can see the action we created:
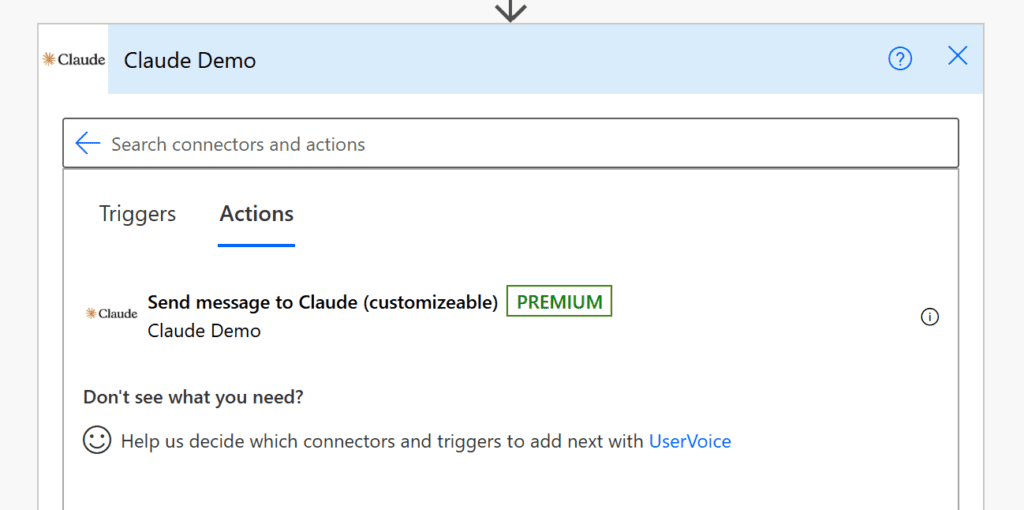
After I added it in classic, it showed up in the modern UI too. I’m not sure if that was a timing thing or if using it triggered something.
Let’s try running it:

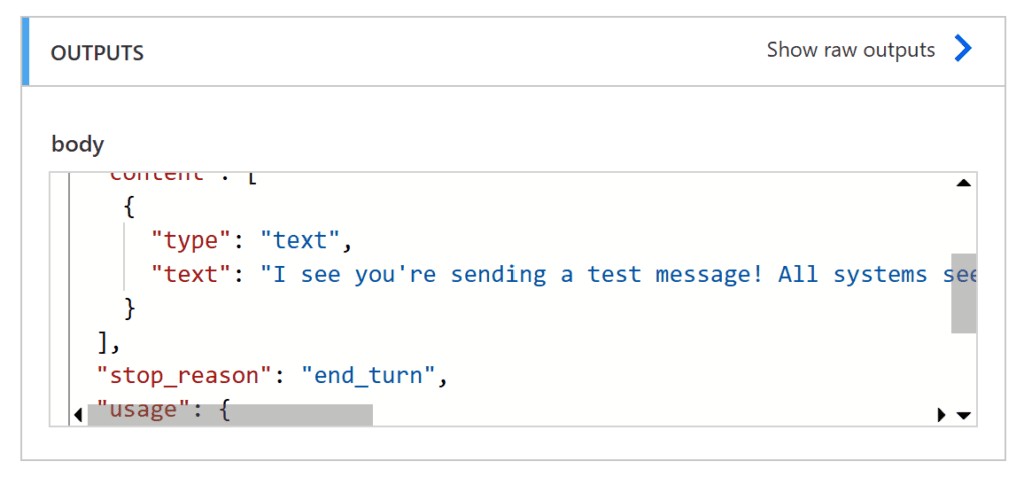
Output looks good! Claude says:
“I see you’re sending a test message! All systems seem to be working fine on my end. Is there something specific you’d like to chat about or ask me? I’m here and ready to help!”
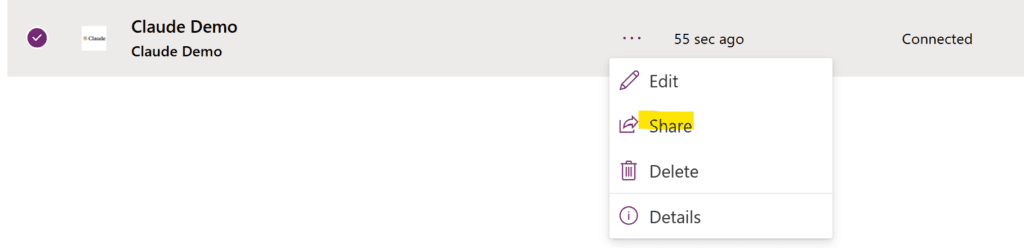
Sharing the connector
Your custom connector won’t show up for people unless you share it with them. If you navigate back to the custom connector UI (the one you had to click “discover all” in the portal to get to above), you can share it:
Each user will be prompted to create a connection when they use the connector the first time, at which point they can input their API key (or you can share a connection you create from the connection list and they can select it without having to enter a key). Having separate API keys can help to differentiate spend, if you’re paying attention to that.
You can also use Azure Key Vault if you have that.
How do I use the outputs of this in the flow?
If you want to do something with Claude’s reply, you need to be able to reference the action outputs and get the text response. There’s a few ways to do this – after trying them all, I think the simplest way is to just reference it from the JSON structure with an expression. This will get the response text, you can stick it in a compose action to make it more friendly in the menu:
body('Claude_action_name_here_no_spaces')?['content'][0]['text']Replace the bit in the body with whatever you called your custom action step in your flow, replacing spaces with underscores. I have another post that describes how the reference expressions work.
An alternative is to map the output values into cards in the connector settings (you can do this by pasting a sample response there), but the difficulty is it’ll auto-insert a for-each loop when you drop the response card into the flow regardless. To avoid the loop, you’d normally wrap the card in a first() expression, but when you do that the “text” response disappears from the menu, replaced by “content”, which is a level up from the text, so you end up having to use an expression to reference the response either way.
What about other LLMs?
You can use this technique with any LLM, just get the correct host URL, headers, and example JSON request from the documentation so that your API call is formatted properly.
Licensing
Custom connectors will require a Power Automate premium license for the owner of the flow. This isn’t one of the “heavier” premium licenses – it’s currently $15/mo (see pricing page).