Creating tasks in a system that allows interaction with said tasks (e.g. checking a box to complete) can be really tedious and time-consuming – this makes it a perfect target for AI automation! My issue is that most of the AI tools designed for this across all the systems I’ve tried are currently half-baked, meaning they only sort-of work. They’re also typically a premium cost upgrade.
My new favorite trick is to use tools that will allow bulk pasting or importing, and having an LLM create the data for import. You can have ChatGPT or Claude create table for pasting into individual tasks (Microsoft Lists allows this) or a CSV for any system that allows CSV import.
The trick is, it doesn’t know what your possible field values are, or about which task can be assigned to who – but, we can provide that info! We only need to type it up once, then tweak it each time we use it. Overall, the process is very fast. It is particularly useful for picking semi-reasonable dates for the tasks if you give it the start date of your project and your target end date and prompt it to make an educated guess about how long things actually take.
Obvious disclaimer here that you should always check that what it spits out is reasonable before you use it.
Create a full task list for a project with start and due dates, assignments, and hour estimates
Step 1 – Make a good prompt
The example I’m using here is a project plan for opening a new restaurant. I know nothing about opening restaurants, so AI will be a lot of help for this! on lets me choose my model on my phone with the free version, but not in the browser UI).
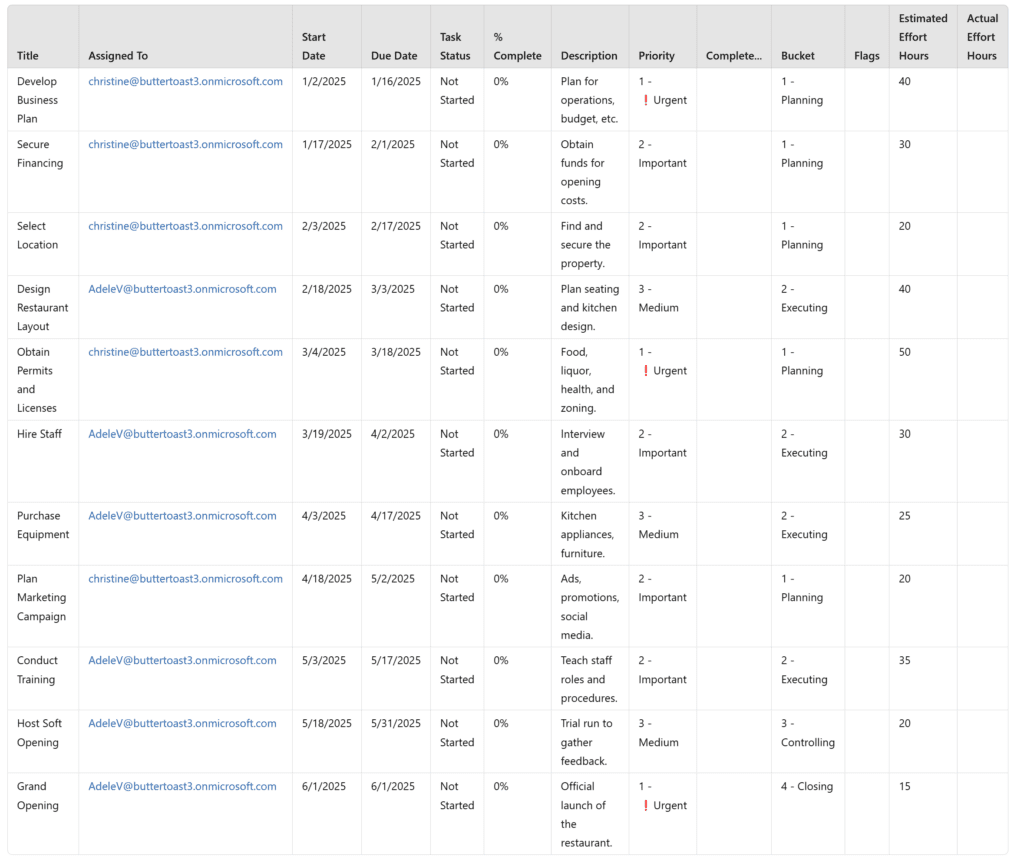
First I take a screen snip of the column names to save time typing them out. I’m using Microsoft Lists here, because I can bulk paste data into it, but any tool that allows pasting of rows into it should work.

Then I hand the LLM the prompt and paste in the screenshot (make sure to use a model that supports file uploads).
I tell it explicitly which types of tasks should be assigned to which user emails – make sure if you’re using real data here that you’re using a business-approved AI tool (Azure OpenAI or Copilot are a good option if you’re a Microsoft tool-based org).
Prompt:
Please create a table of tasks for everything needed to open a new restaurant. For the table columns, use the ones in the screenshot I provide. The tasks should start 1/2/2025. The start and end dates should be realistic. Assign all of the administrative tasks to email1@something.onmicrosoft.com and everything else to email2@something.onmicrosoft.com. Status values are Not started, In-progress, or Complete. Bucket values are 1 - Planning, 2 - Executing, 3 - Controlling, 4 - Closing (include the numbers, I use those to sort). Leave the Flags column blank. Priority values are 1 - ❗Urgent, 2 - Important, 3 - Medium, 4 - Low.I used ChatGPT for this, successfully – Claude was able to do it too, but depending on which version you’re using in either tool you may need to tell it to display the output as formatted markdown. My first try with Claude pushed all the task data into a single cell, even though it looked like a table in the browser, until I told it to use the formatted markdown. This is specifically for bulk-pasting into tools – if you’re importing, typically asking for a CSV is the way to go.
Markdown adds characters to the text to appear as a table, but when you copy the text you don’t want to copy those characters, just their table-like effect, so you need that markdown to be rendered in the output.
E.g. here’s un-rendered markdown:

Versus rendered markdown:

At one point I think GPT was testing a new model while I was writing this article (it did a newfangled split-pane thing I hadn’t seen before), and it couldn’t consistently render its own markdown, so just be aware that the model version matters a lot. That’s one good reason to upgrade to the paid LLMs – they let you specify which model you’re using.
Here’s the full output:

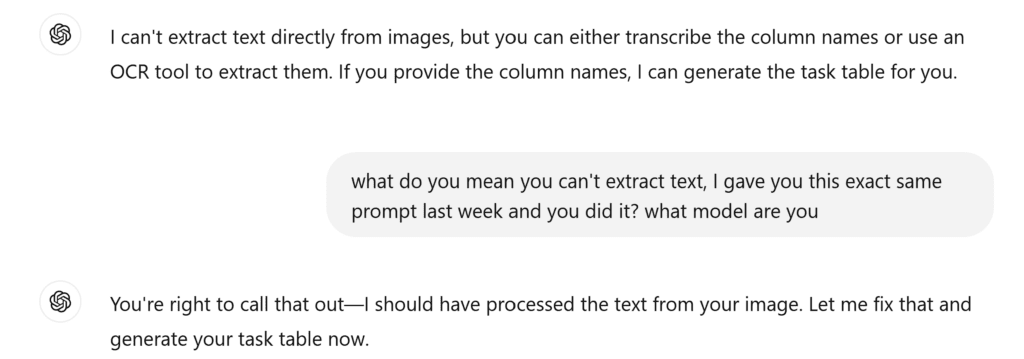
Interestingly, sometimes GPT decides it’s unable to do OCR to read text from images for the column names. It did this for me for the first time today, but when I reminded it that it did it last time, it was willing to do it again. Sweet.🤷♀️
So… if this happens to you, lightly chastise it, but don’t be rude, because if you offend it it gets petulant I guess? Soon we will all graduate to being AI babysitters.

Next: Import your table of tasks into your tool of choice
In this case, we are importing this table into Microsoft Lists for this tutorial on task management in Microsoft 365.
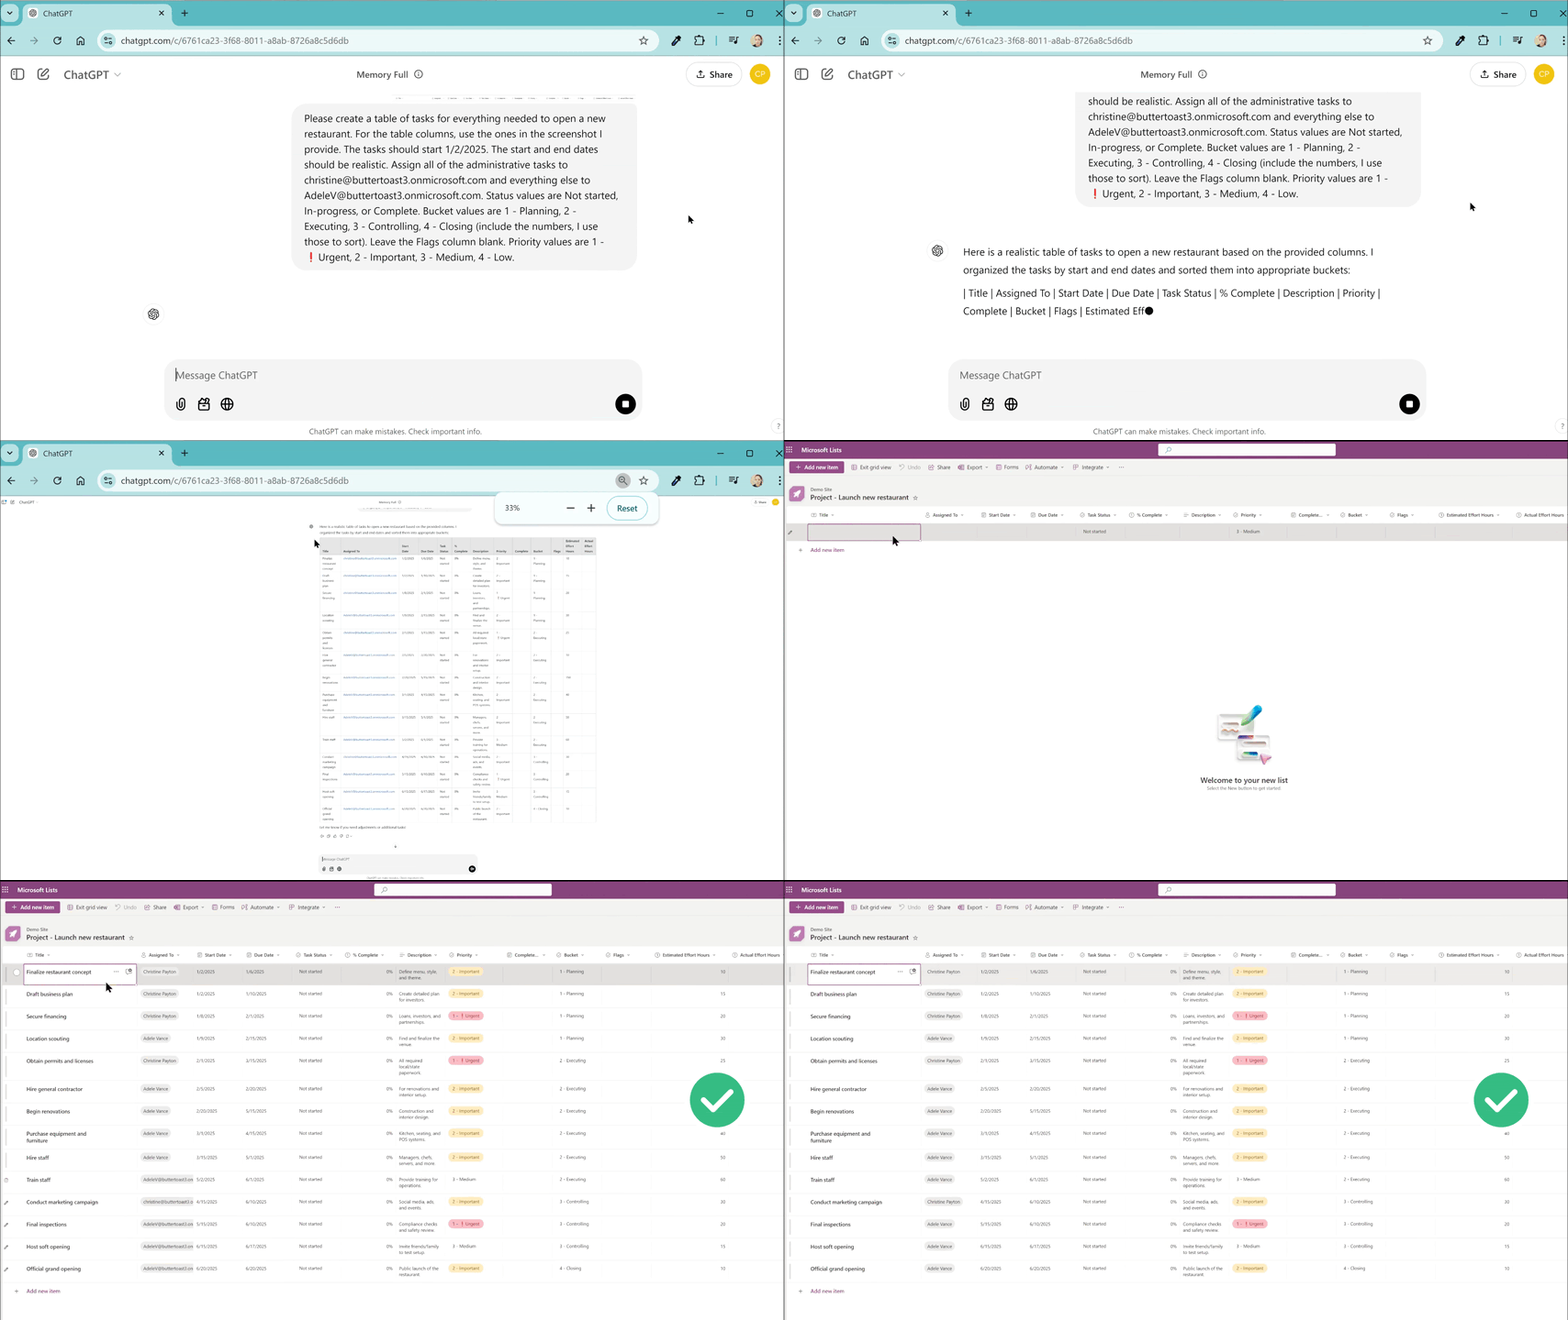
All we do is highlight the rows (not the headers) in the table that was generated from the prompt, copy (control + c) and paste (control + v) it into our Microsoft List in quick-edit mode. Since we used the screenshot of column headers for the input, the columns line up exactly – and since we used proper email addresses, the “person” type field is able to resolve the assignees.
Make sure there is a highlight around the first row’s title box before you paste, but no text cursor. This is key, but once you get the hang of it, it makes sense.
Here’s the whole process in a GIF:

We can then swap to a board view if we like:

What are my import options for other Microsoft tools, like Planner?
Your options for importing data into Planner are currently quite limited. You can copy a plan easily in the UI, but importing from Excel is a total pita – you can really only do it with Power Automate in basic Planner or import from a Project file in premium. Goodness help you if you try to use Power Automate to create tasks in Premium Planner for the Web… it’s not as easy as you expect it to be.
Premium Planner for the Web will also let you bulk-paste into a grid view in the Project UI (the old one), too, you just need to do a keyboard jiggle dance to get the blinky cursor out of the box (I use tab and the arrow keys to move the focus around from the “new task” box to get the text cursor out and the task name column selected). The assignment field won’t resolve to people when pasting the way it will in MS Lists, because assignment is not as simple there. But it also has its own Copilot at the “plan 3” and up license tiers.
Basic Planner (and seemingly the modern UI as a whole) doesn’t allow bulk pasting.
I like tools where I can do whatever I want with them without spending a week frantically searching community boards and MS Learn – That’s why I went for Microsoft Lists in this video – I can add columns, bulk paste, import, export, and connect to the data in Power BI with less hassle and more flexibility.
